Author Archives: Julie

Watering: How Much?

Water is critical for a healthy garden and landscape, but how much water is too much, how much isn’t enough and how much is just right? Unfortunately, there isn’t a specific answer that suits every gardener’s needs. All plants have different water requirements, which change depending on the type of soil, amount of sun, temperature, humidity, season, maturity of the plant and overall growing environment.

Initial Watering

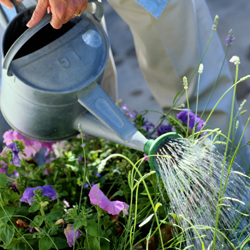
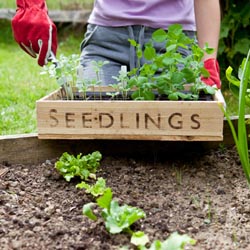
All plants, including specimens described as drought tolerant, will require water when first planted. This is because many of the smaller roots responsible for water uptake are usually damaged during shipment and planting. Build a small circular soil wall around the plant to contain water while it percolates into the soil. Watch new plants carefully and keep them well-watered as their roots settle in and they adapt to their new or transplanted location.

Groups Are Good

It’s a good idea to have some knowledge of the plant’s water requirements when determining the location in the garden. It will keep watering simple if you plant a new specimen near other plants with similar water requirements. In this way, there is no need to readjust an irrigation system or watering schedule, since all the plants in the group have similar needs.

Need a Drink?

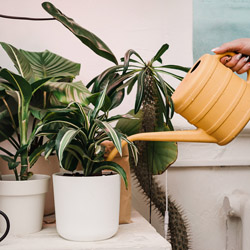
Because plants’ watering needs can change through the season, how can you tell if a plant needs more water? Most plants will wilt as the soil becomes too dry. The leaves may droop, and if it’s an upright plant, the top ends may become soft and bend over. Glossy plants may begin to look dull, while thick leaves will shrivel. If you notice these signs, it is time to water! Most plants will revive if watered quickly enough, but be sure to water deeply rather than allowing moisture to run off the surface.

How can you tell if you should water? Push your finger into the soil an inch or two from the base of a plant. Perfect soil should feel cool and slightly moist. Some soil should stick to your finger. If none does, it’s too dry. If it’s muddy, don’t water. Overwatering kills plants by depriving the roots of oxygen. Some gardeners use water meters to see the precise amount of moisture. If you’re unsure, this tool can be helpful.

Adjusting Your Watering Schedule

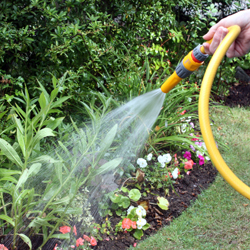
The amount you have to water your plants or landscape can change from day to day. A cool morning will allow more dew to form and drain to the soil, or a sudden afternoon thunderstorm can be enough water to keep your plants hydrated for a few days. An overly hot day, however, can rapidly deplete water resources and extra watering may be required. Check your plants and landscape regularly to be sure they are getting adequate water, and make adjustments as needed to keep them suitably moist without either too much or too little water.

Need help monitoring water? Stop by to see our collection of water gauges, meters and monitors that can help you be sure you are watering your landscape correctly.


Growing Veggies in Containers

Do you dream of a delicious, homegrown harvest but don’t have the land to use? No longer should a shortage of garden space prevent you from growing your own fresh vegetables. As long as you have a sunny location you can have your own mini-farm on your porch, patio, deck, balcony, roof-top or doorstep!

Why Use Containers?

The benefits of growing containerized vegetables go beyond the issue of space. There are plenty of other compelling reasons to plant your veggies in pots, including…

  1. Vegetables are amazingly ornamental and can be just as decorative as any other container plants or flowers.
  2. There are fewer problems with pests such as groundhogs, deer and rabbits and soil borne diseases.
  3. The soil in pots warms up more quickly in the spring allowing for earlier planting and an extended growing season.
  4. Less bending, squatting and kneeling is required for gardeners with limited mobility.

Vegetables can be grown in any vessel that can hold soil, has adequate drainage and is large enough to hold a plant. There are endless options available on the market or you may recycle items that you already have as long as they meet these requirements. Use your imagination – try a wheelbarrow, wine barrel or just a plastic bin, and you’re ready to plant!

Best Vegetables for Containers

While all veggies can be grown in containers, some are better suited than others. Plants that grow particularly large, that sprawl or that must be grown in large numbers to ensure an adequate yield may take more effort and careful site planning with an adequate container. Similarly, vining plants need not be avoided. Trellis these plants up against a wall or fence or allow them to cascade down from a taller pot or a container placed up high like on a stone wall. For smaller selections, a hanging basket or window box may be used. Many sprawling and vining vegetables are now available by seed in dwarf, compact or bush varieties. These are bred specifically for small spaces and containers and are worth seeking out.

Tips for Container Vegetable Gardens

Growing vegetables in containers does take some unique thought and isn’t quite the same as planting in a traditional garden. When planning your delicious container garden, consider…

  • Containers: Size matters when planting in containers. The bigger the container, the more soil it can hold. More soil more and more moisture means less watering. Take note that porous containers like terra cotta dry out more quickly and will therefore require more frequent watering.
  • Soil: When planting, choose a good quality potting mix. Soil from the ground may contain insects or disease or may be too heavy. Add an all-purpose balanced fertilizer at time of planting. It is also good idea to mix water absorbing polymers into the soil. These granules can hold up to 400 times their weight in water and help reduce watering from 30-50 percent.
  • Plants: Some of the vegetables that you select may be directly seeded into your container; these would include peas, beans, radishes and corn. With most vegetables you may wish to transplant seedlings into your container, either home-grown or garden center purchased. You will generally find a wider selection of vegetable varieties and unique options available in seed as opposed to purchased seedlings, if you want to use your containers experimentally.
  • Supports: Supports should be placed at time of planting for large or vining plants. This will ensure the young plants are not disturbed or damaged with supports added at a later time. If the supports are outside the container, however, they can be added only when they are needed.
  • Location: Your vegetables will require at least 6 hours of direct sun a day. If this is not possible you may try placing your pots on dollies or carts and moving them to a sunnier location as the sun moves throughout the day. Note that good air circulation is important for disease control.
  • Watering: Test soil frequently for water to make sure that you keep it evenly moist. Water the soil, not the plants, to avoid the spread of disease. Check soil moisture more frequently during the summer months when evaporation is faster. Mulching your containers with salt hay or grass clippings will help keep soil cool during the summer months and reduce the frequency of watering. If possible, a drip system can be a great option for keeping containers watered.
  • Fertilization: Fertilizer leaches through pots quickly. Fertilize containerized vegetables at least once a week with a water soluble fertilizer. Always be careful to follow the directions on the fertilizer package and follow the recommended rate. Too much fertilizer may burn or kill your plants, but too little will result in undernourished, underperforming plants.

With appropriate care that caters to the needs of containers, your small-scale vegetable garden can be just as lush and productive as any larger, more intensive space, and you’ll soon have a bountiful harvest to enjoy.


The Urban Jungle

No matter what the size or style of your own personal urban habitat, you can add stunning nature with the right houseplants. Furthermore, when you grow your own urban jungle, you can realize and enjoy all the benefits houseplants bring to your home.

Benefits of Urban Houseplants

Houseplants bring a range of benefits into any home with every leaf and bloom. Not only do plants improve oxygen levels by drawing carbon dioxide from the air, they also remove other pollutants and odors, particularly in smaller urban homes where airborne toxins may be more concentrated. Houseplants also lower dust levels and improve humidity indoors, which can help alleviate allergies, respiratory conditions, dry skin, and other health problems. Larger houseplants help dampen unwanted sounds, creating a more tranquil atmosphere. Studies have also shown that houseplants improve mood and relaxation by providing a tangible connection to nature, which can help reduce depression and Seasonal Affective Disorder. With so many benefits, adding even one or two houseplants to your home can help create more positive, enjoyable surroundings, and a full urban jungle can become your sanctuary in the city.

Best Plants for an Urban Home

There are many types of houseplants to choose from, any of which will bring numerous benefits to your home. Before choosing, however, consider the levels of sunlight in your home, as well as changing light levels throughout the year, to be sure you can provide adequate light for a particular plant to flourish. Overall room temperatures can also affect plants, as some thrive in cooler climates while others prefer warmer rooms. Note the available space you have and choose a plant that won’t soon become crowded or cramped, which can inhibit growth. Also be aware of the ongoing care each plant will need and whether your schedule will permit you to maintain the plant well, or if you need a plant that is a bit more forgiving of neglect.

The top houseplants that thrive in urban households include:

  • African violets
  • Cacti
  • Cast iron plant
  • Dracaena species
  • Dumb cane
  • Ferns
  • Golden pothos
  • Lucky bamboo
  • Peace lily
  • Snake plants
  • Spider plants
  • Succulents

Depending on the size of your home and how green your thumb is, you may choose to start with just one or two houseplants, or you could opt for an entire jungle. Ideally, one medium-sized houseplant is best for every 100 square feet of living space to keep the air clean, but you can have as many or as few plants as you wish for your happiness.

Caring for an Urban Jungle

It is easy to keep houseplants lush, but they do need dedicated care to stay healthy.

  • Choose a Proper Pot – The pot should be the right size for your houseplant. A too-small pot will cramp the plant and inhibit growth, while a too-large pot will encourage overgrowth and legginess on different plants. The pot should also have suitable drainage to keep the root system healthy and avoid rot.
  • Use Good Quality Soil – Rather than outdoor soil that may not be as rich and could bring pests into your home, opt for a good quality potting mix formulated for houseplants. These mixes will often have moisture-retention beads or fertilizer pre-mixed into the soil, making houseplant care easier. You can also look for specialty blends for cacti, succulents, flowering plants, and other specific types of houseplants.
  • Water Appropriately – Overwatering or underwatering can be deadly for houseplants. Check your plant’s specific watering needs and adjust watering as needed for different seasons. Choosing self-watering pots or using globe watering stakes can also help keep a houseplant safely watered.
  • Feed Regularly – Houseplants need occasional fertilizer applications to supplement the nutrition they draw from their potting soil. Choose a liquid fertilizer formulated for your specific plants and follow application instructions on the product label. Most houseplants’ nutritional needs are reduced during the winter months.
  • Provide Sufficient Light – Different houseplants have different sunlight needs. Some will do very well in shadier spots, while others need filtered light or even a few hours of bright sunlight. Moving plants to different locations in different seasons can help them get adequate light and rotating the pots will help plants grow straight without stretching to reach the sun.
  • Position Safely – Place houseplants away from hazardous situations such as areas where they may be accidentally tripped or tipped over. Avoid creating your urban jungle near heating or cooling vents and cold winter drafts. Keep houseplants out of reach of pets that may nibble on leaves or dig in pots.
  • Prune as Needed – Keep your urban jungle looking tidy by pruning and trimming plants to maintain their shapes or remove dead leaves. Brown tips can also be trimmed for a neater appearance but avoid vigorous pruning that could stress the plant.
  • Watch for Pests – Fungus gnats, mealybugs, spider mites, and other pests can invade even the most well-protected urban jungle. Stay alert for any pests and take steps immediately if they do appear. Plant-friendly insecticidal soaps, top dressing treatments, neem oil, and other control options are available depending on which pests are present.
  • Clean Your Plants – Refresh houseplants and brighten your urban jungle with regular cleanings. Dust, dirt, and other debris can gather on plants’ foliage, clogging respiratory pores and dulling the plants’ color. A quick rinse in the shower or regular dusting with a moistened cloth and a gentle hand can keep plants looking their best.

Your urban jungle can bring you many benefits, whether you just have one or two houseplants, a simple plant collection, or an elaborate nature sanctuary in your home. By choosing the best plants for urban living and providing them with proper care, they will in turn nurture you and help you reconnect with nature, no matter where you live.


What Is the Difference Between an Annual, a Perennial, and a Biennial?

All living creatures, including plants and flowers, have expected lifespans. Recognizing the differences between annuals, perennials, and biennials can help you determine the life expectancies of different garden center plants so you can choose the varieties that will work best in your garden, landscape, and containers.

Annuals

Annual plants are fairly straightforward. These plants complete their entire lifespan in just one year or growing season, from first sprouting from seeds and growing foliage, stems, and blooms to creating seeds to continue the next generation. After the plants die, they will not regrow from their initial roots, but must restart from seeds again as completely new plants. Annuals are generally faster growing and have longer bloom seasons, making them colorful showstoppers in the garden and landscape.

Common and popular annuals include…

  • Begonias
  • Cosmos
  • Impatiens
  • Marigolds
  • Petunias
  • Zinnias

In addition to many popular flowers, most garden vegetables are also grown as annuals, though some of them would botanically be classified as perennials if they were allowed to remain in place for multiple years.

Perennials

Perennial plants are those with a lifespan that lasts at least three years, though they can live significantly longer as well. Perennial foliage may die back during the winter months but will regrow from dormant roots the next season. These plants often take longer to mature and may have shorter blossom times than annuals, but they can provide many years of beauty in the landscape.

Familiar perennials include…

  • Coneflowers
  • Coral bells
  • Daylilies
  • Peonies
  • Phlox
  • Sedum

In addition to these elegant and popular flowers, hedges and trees are also perennials. These plants are staples in the yard and provide a foundation for any landscape.

Biennials

Biennials fall between annuals and perennials with a two-year life cycle. During their first year, these plants establish leaves, roots, and stems. Though they may die back slightly over the winter, they will rejuvenate in the spring and grow flowers in their second year, maturing to seeds before the plants die completely.

Familiar biennial flowers include…

  • Canterbury bells
  • Columbine
  • Dame’s rocket
  • Forget-me-nots
  • Foxglove
  • Hollyhocks

Because these plants do not bloom in their first year, patience is essential to enjoy their beauty in their second year. Planting biennials in two successive years can ensure the plants enhance the landscape in multiple years.

Choosing Annuals, Perennials, and Biennials for Your Yard

Once you understand plant lifespans, you can more easily choose the plants that will give you a landscape you love. When choosing plants, larger perennials can create a stunning foundation or border for your yard, including showstopping specimen plants and shade trees. Smaller perennials can fill in larger spaces in flowerbeds and edging, while annuals add brilliant color to pathways, edges, and very visible spaces, including porch pots and containers.

Biennials can be spectacular transition plants, particularly if you may plan on expanding your landscaping beds in the future, or want to fill in a space temporarily before adding a new deck, porch, or otherwise expanding your home or outdoor living space. Biennials are also great choices if you want to enjoy a changing landscape without as much work each year, because you can enjoy the plants for two years before they need replacing. Many biennials are self-seeding making them great additions to the cottage garden.

Ultimately, a landscape that includes a thoughtful mix of annuals, perennials, and biennials will showcase different colors, textures, and growth patterns for stunning visual interest. New cultivars are developed every year, and greenhouses often have the latest plants and newest showstoppers on display. If you plan a mixed landscape, you will have the freedom to enjoy new plants as they are introduced and you will always have new plants to be excited about.

Caring for Annuals, Perennials, and Biennials

While the differences between annuals, perennials, and biennials may seem clear, different plants can have different lifespans based on the exact cultivar, gardening zone, climate variations, and even microclimates within an individual landscape. Furthermore, the care plants receive can ensure they reach their maximum potential for the longest, most productive life. YOUR GARDEN CENTER (insert IGC here) experts can provide recommendations and guidance for the best plants based on your preferences and needs and assist you in choosing plants that will thrive in the conditions of your yard, including soil type, sunlight levels, fertilization, moisture levels, and other needs. To provide each type of plant the best care, consider…

  • Annuals – Provide nourishing fertilizer formulated for the type of plant, and weed around them carefully so these fast-growing plants don’t need to compete for moisture and nutrition. Soaker or dripper hoses can also provide great watering as these plants flourish.
  • Perennials – Be sure these plants have adequate space in the landscape to reach their full size. Good quality mulch can help protect the roots each winter so the plants remain healthy for the next spring.
  • Biennials – Take care to provide appropriate fertilizer for these plants in their different life stages, and mulch around those with basal leaves to provide good winter protection during their dormancy.

Adding annuals, perennials, and biennials to your landscape will not only help you learn about plant lifespans, but you will enjoy a more varied and richly diverse landscape, with plants that provide beauty through the years.


Tree Peony: The Ancient Empress

From the ancient palace gardens of China comes an elegant empress, the tree peony. Native to China, the tree peony (Paeonia suffruticosa) has been grown by Chinese herbalists, gardeners and nobility for more than 1,500 years. In 1994, China named this beauty as its national flower, giving it a treasured place in history and sparking more interest in its botanical nature worldwide.

In recent years, tree peonies have become increasingly popular and more readily available for landscape use. This plant is distinctly different from the herbaceous peony that we are so familiar with in our American perennial beds. The tree peony is a deciduous woody plant with fern-like foliage that produces larger flowers two weeks earlier than its perennial partner. These blossoms come in a wide range of shapes, colors and fragrances depending on the cultivar, providing great variety to suit any landscape.

Tree Peony Particulars

Not sure if the tree peony will be best for your landscape? Learning more about these exotic beauties can help you decide if you want to welcome one to your yard.

  • This slow-growing woody shrub grows 4-10 feet tall with distinctive, silken blossoms in a multitude of shapes, colors and fragrances.
  • Flowers best with most vigorous blooms in dappled shade with 3-4 hours of filtered sunlight per day.
  • Tree peonies require a site with good drainage amended with plenty of organic matter. Space plants at least 4 feet apart to provide good air circulation.
  • Prefers a soil pH range of 6.5-7.0. Use organic mulch or added sulfur to lower the pH level if necessary for the best nutrition.
  • Tree Peonies are heavy feeders. Do not fertilize the first year. Foliar feed in the spring of the second year when the leaves emerge with an organic fertilizer. Fertilize again after blooming and again in the fall before dormancy. Spread organic material (compost or manure) around the base of the plant each spring and gently work into the soil for slowly-released nutrition.
  • Virtually pest- and disease-free if planted in a good location with organically-rich soil to feed from.
  • Deadhead after blooming and clean up fallen leaves in autumn to keep the tree looking its best in every season.
  • Prefers to be transplanted in the fall if moving is necessary, or plant new specimens in fall to allow them to establish before winter.

Once your tree peony is established it will reward you each year with an abundance of glorious blooms, bringing exotic flair and distinction to your landscape.

Growing Under Black Walnut

If you have a black walnut tree on your property, you know how difficult it can be to find anything that will grow anywhere near this plant.

Black walnuts release a substance called juglone into the soil, which is toxic to many ornamental and edible plants and can stunt their growth significantly – in fact, juglone is used as a herbicide in some areas! A mature black walnut tree can have a toxic zone with up to an 80-foot radius, depending on the tree’s size and age. Every part of the walnut tree contains juglone and this substance remains in the soil long after the tree is cut down, continuing to inhibit anything that may be planted in its place.

Fortunately, there is a wide variety of plants that are less affected by juglone and can still thrive in contaminated soil. When choosing to plant in an area where a black walnut is located or where one once stood, it is safe to make your selection from the lists below.

Vegetables

  • Beans
  • Corn
  • Carrots
  • Melons
  • Squash

Fruit

  • Black Raspberry
  • Cherry
  • Nectarine
  • Peach
  • Pear
  • Plum

Annuals

  • Pot-marigold, Calendula officinalis
  • Begonia, fibrous cultivars
  • Morning Glory, Ipomoea
  • Pansy, Viola
  • Zinnia species

Perennials

  • Bugleweed, Ajuga reptans
  • Hollyhock, Alcea rosea
  • European Wild Ginger, Asarum europaeum
  • Astilbe species
  • Bellflower, Campanula latifolia
  • Leopard’s-Bane, Doronicum species
  • Sweet Woodruff, Galium odoratum
  • Cranesbill, Geranium sanguineum
  • Common Daylily, Hemerocallis
  • Coral Bells, Heuchera
  • Plantain-lily, Hosta
  • Siberian Iris, Iris sibirica
  • Balm, Monarda didyma
  • Sundrops, Oenothera fruticosa
  • Summer Phlox, Phlox paniculata
  • Polyanthus Primrose, Primula x polyantha
  • Lungwort, Pulmonaria species
  • Showy Sedum, Sedum spectabile
  • Lamb’s-Ear, Stachys byzantina
  • Spiderwort, Tradescantia virginiana
  • Horned Violet, Viola cornuta

Ferns

  • Crested Wood Fern, Dryopteris cristata
  • Senstitive Fern, Onoclea sensibilis
  • Cinnamon Fern, Osmunda cinnamomea

Bulbs

  • Glory-of-the-Snow, Chionodoxa luciliae
  • Crocus species
  • Winter Aconite, Eranthis hyemalis
  • Snowdrop, Galanthus nivalis
  • Spanish Bluebell, Hyacinthoides hispanica
  • Grape Hyacinth, Muscari botryoides
  • Siberian Squill, Scilla sibirica

Trees

  • Japanese Maples, Acer palmatum
  • Eastern Redbud, Cercis canadensis
  • Canadian Hemlock, Tsuga canadensis

Vines and Shrubs

  • Euonymus species
  • Rose of Sharon, Hibiscus syriacus
  • Honeysuckle, Lonicera species
  • Virginia Creeper, Parthenocissus quinquefolia
  • Arborvitaes, Thuja species

Black walnut can be a challenging plant to have in your landscape, but if you understand the unique characteristics of this tree you can easily pair it with other plants that don’t mind its toxic effects.

Seed Starting

Starting seeds indoors is a rewarding gardening experience and can help extend your growing season to include more plant varieties than your outdoor season may permit. Furthermore, a larger selection of seed varieties doesn’t limit your opportunities to growing only those transplants that are available at planting time. The key to success in growing seedlings is in creating the proper environment.

What Seeds Need

Seeds are generally hardy, but to start them properly they do need gentle nurturing so they can produce healthy, vibrant plants. In general, seeds should be started 4-6 weeks before the recommended planting time so the seedlings will be large and strong enough to withstand the stresses of transplanting. Use a sterile growing mix which is light enough to encourage rich root growth. Sow the seeds thinly and cover lightly with sphagnum peat moss. Water using a fine spray but do not soak the seeds – they also need oxygen to germinate, and if they are overwatered they will drown. Cover the container with clear plastic to hold the moisture and increase humidity. Place the containers in a warm (70-80 degrees) spot and watch daily for germination. The top of the refrigerator is often an ideal location. When the first seeds germinate, place the seedlings in bright light or under artificial lights (tube lights should be 2-3” from seedling tops) for several hours each day, since late winter sunlight will not usually be sufficient to prevent weak, leggy seedlings. Daytime temperatures should range from 70-75 degrees. Night time temperatures should range from 60-65 degrees.

As Seeds Grow

When the seedlings develop their first true sets of leaves, add half-strength water soluble fertilizer to their water – organic fish emulsion or seaweed fertilizers are great to use. Repeat every second week to provide good nourishment. Thin the seedlings or transplant them to larger containers as they grow. Before planting outdoors, harden-off the plants at least one week before the planting date. Take the transplants outdoors in the daytime and bring them in at night if frost is likely. Gradually expose them to lower temperatures and more sunlight. The use of hotcaps and frost blankets to cover early plantings will also aid in the hardening off process so the seedlings can adjust well to their new outdoor environment.

Transplanting Seeds

Transplant seedlings into the garden after the safe planting date on a calm, overcast day. Pack the soil around the transplant with as little root disturbance as possible. Sprinkle the plants with water, keeping the soil moist until the plants become established.

Popular Indoor Seed Start Dates

The exact dates you want to start seeds will vary depending on your local growing season, the varieties of plants you choose and what their needs are. In general, dates for the most popular produce include…

Vegetable Seed Starting Dates

  • February – Asparagus, celery, onion
  • March 1 – Broccoli, Brussels sprouts, cabbage, cauliflower, collards, kale, lettuce
  • March 15 – Eggplant, peppers, tomatoes
  • April 1 – Summer squash
  • April 15 – Cantaloupes, cucumbers, winter squash

Flower Seed Starting Dates

  • January/February – Begonia, carnation, geranium, impatiens, nicotiana, pansy, rudbeckia, salvia, snapdragon, verbena, vinca
  • March 1 – Ageratum, dahlia, dianthus, petunia
  • April 15 – Aster, calendula, celosia, marigold, zinnia

Use seed starting dates as a general guide to ensure your seeds have plenty of time to reach their full harvest potential before the weather turns in autumn. At the same time, consider staggering seed starting every few days to lengthen your harvest and keep your favorite vegetables and flowers coming even longer during the growing season. As you gain more experience with starting seeds, you’ll be able to carefully plan your seed calendar to ensure a lush, rich, long harvest season.


Ideas for Creating Winter Interest in the Garden

How does your winter landscape look from inside your home? Even if it’s bleak and uninteresting, it can be easy to renovate and redecorate – just treat it like your home! Perk it up by using your indoor decorating skills outdoors.

When you decorate your house, you make it interesting and inviting by hanging pictures on the walls, creating focal points with houseplants or statuary, adding color and displaying collections. A garden is no different. Texture, layers, colors, scents, sounds and movement all combine to create a wonderful space to enjoy when outside in the summer and from inside the house during the winter.

If the temperatures are low and the snow is deep you can’t plant right now, but these plants could go on your wish list in your gardening journal to enhance the view next winter. Here are some suggestions to get your dreaming started…

Colorful Berries

Not only can berries add an easy burst of color to the landscape no matter which direction you view it from, but they can attract winter wildlife as well. Winter berries may be black, white, red, orange, pink, purple, blue or golden. Popular options include…

  • Hollies (Ilex spp.)
  • Red Chokeberry (Aronia arbutifolia)
  • Florida Dogwood (Cornus florida)
  • Cotoneaster varieties
  • Creeping Wintergreen (Gaultheria procumbens)
  • Heavenly Bamboo (Nandina domestica)
  • Winter King Hawthorn (Crataegus viridis ‘Winter King’)
  • Linden Viburnum (Viburnum dilatatum)
  • European Cranberrybush (Viburnum opulus)
  • Bayberry (Myrica pensylvanica)
  • Crabapples (Malus spp.)

Ornamental Bark

Exfoliating, or peeling, barks may reveal underlying bark of the same or differing color. Patterned, ridged or furrowed bark offers visual interest, especially against snow. Consider…

  • Paperbark Maple (Acer griseum)
  • Striped Maple (Acer pensylvanicum)
  • Arctic Fire Dogwood (Cornus stolonifera)
  • Redosier Dogwood (Cornus sericea)
  • American Hornbeam (Carpinus caroliniana)
  • Cinnamon Clethra (Clethra acuminata)
  • Paper Birch (Betula papyrifera)
  • Yellow Birch (Betula alleghaniensis)

Seed Heads

Although we often deadhead plants as blossoms die, leaving a few to overwinter is a fabulous idea. Not only do they provide uniquely organic winter sculptural interest to the garden, but they also provide feed and protection for birds. Winter seed heads, when backlit by the low winter sun, really add pop in the landscape. Try leaving some seed heads on the following plants…

  • Hydrangeas
  • Roses
  • Sedums such as Autumn Joy
  • Rudbeckias
  • Echinacea
  • Astilbe
  • Caryopteris

Unusual Branching

Especially beautiful when encased in ice, unusual branching patterns create natural focal points pulling the viewer’s vision through the winter garden. These plants prove a winter garden doesn’t need to be boring…

Twisting Growth:

  • Harry Lauder’s Walking Stick (Corylus avellana ‘Contorta’)
  • Curly Willow (Salix matsudana ‘Tortuosa’)
  • Twisty Cryptomeria (Cryptomeria japonica ‘Rasen-Sugi’)
  • Dwarf Twisty Baby Black Locust (Robinia pseudoacacia ‘Lacy Lady’)
  • Contorted White Pine (Pinus strobus ‘Contorta’)

Weeping Shape:

  • Weeping Cherry (Prunus subhirtella varieties)
  • ‘Lavender Twist’ Weeping Redbud (Cersis canadensis ‘Covey’)
  • Weeping Crabapples (Malus spp.)
  • Maples (Acer spp.)

Ornamental Grasses

Nothing adds structure to the winter garden like ornamental grasses. Whether blowing in the breeze and adding movement or covered with reflective ice, grasses add texture, volume and the subtle colors of seed heads. Great options include…

  • Silvergrass (Miscanthus spp.)
  • Switchgrass (Panicum spp.)
  • Northern Sea Oats (Chasmanthium)
  • Karl Foerster Feather Reed Grass (Calamagrostis ‘Karl Foerster’)
  • Fountaingrass (Pennisetum alopecuroides or P. setaceum ‘Purpureum’)
  • Tufted Hairgrass (Deschampsia cespitosa)

Evergreens

No garden is complete without evergreens. Broadleaf evergreens and conifers establish the garden’s foundation. They anchor the beds when the perennials disappear, define boundaries and pathways and soften hard edges. Many broadleaf evergreens also provide summer flowers and fragrance.

Broadleaf Evergreens:

  • Aucuba japonica
  • Azalea and Rhododendron varieties
  • Boxwood varieties
  • Holly varieties
  • Laurels
  • Leucothoe
  • Pieris varieties
  • Skimmia
  • Yucca

Conifers:

  • Spruces such as Dwarf Alberta Spruce (Picea glauca var. albertiana ‘Conica’)
  • Silver Korean Fir (Abies koreana ‘Horstmann’s Silberlocke’)
  • Umbrella Pines such as Japanese Umbrella Pine (Sciadopitys verticillata)
  • Junipers such as Blue Star Juniper (Juniperus squamata ‘Blue Star’)

Bulbs

Several early bulbs emerge in the winter. Planted in the fall near entrances and along walkways, they offer their promise spring is just around the corner and can add a burst of color to the end of winter. Popular options include…

  • Crocus varieties
  • Yellow Danford Iris (Iris dandordiae)
  • Snowdrops
  • Blue Silberian Squills (Scilla)
  • Snow Glories (Chionodoxa)
  • Grape Hyacinth (Muscari)
  • Hyacinths

Even though you can’t begin planting now, you can begin planning, and perhaps even installing, non-plant garden features such as benches, yard art or lighting. LED lighting along pathways may be high on your list and we have the newest products to help your guests navigate to your doorway in any season. A bench, arbor or trellis adds structure and interest to the garden and will make a perfect meditation spot or reading nook when the weather warms up. You might want to plan a pond, the perfect spot for a fountain or even consider adding a sundial, fire pit or other unique feature to the yard. Whatever your garden dreams, we can help you achieve them, and you’ll never look out at your winter garden and wonder what could be again!


Feeding Birds in Winter

Winter is a crucial time for birds. As temperatures drop, there are no insects to eat and the natural seeds are covered with snow, and as the season lengthens, the berries and crab apples are long gone. Birds need enough food to maintain their body temperatures and must search for food from sun up to dusk. If you provide nutritious options at feeders, birds will flock to your yard all winter long.

Best Foods for Winter Birds

Fatty, high-calorie foods are important for winter birds. Fat is metabolized into energy much quicker and more efficiently than seeds to help them maintain their high body temperature necessary for survival.

A number of backyard foods are excellent sources of quick energy and protein to nourish winter birds, including…

  • Suet
    Suet cakes provide an excellent energy source for birds and are often mixed with seeds, berries, fruit and peanut butter to appeal to a wider range of species. These fatty cakes are easy to add to cage or mesh feeders, or suet balls, plugs, shreds and nuggets are also available.
  • Peanut Butter
    Peanut Butter is also very popular with a large number of birds. To reduce the cost of feeding peanut butter, you can melt it down and mix it with suet or mix in cornmeal so it is not quite so sticky. Smear peanut butter on pine cones and hang them for fast, easy feeders.
  • Seeds
    When native seeds may all be eaten or hidden under snow, seeds at feeders are very important. Seeds contain high levels of carbohydrates that are turned into glucose to help with the bird’s high energy demands. They also are a good source for vitamins and some protein. Make sure the seed you purchase does not have a lot of fillers (milo and wheat seeds) that are not eaten. Mixes with sunflower seeds and millet are preferred.
  • Sunflower Seeds
    If you want to offer just one seed to birds, you can’t beat sunflower seed. Black oil sunflower seeds have a softer shell than the striped seeds and can be eaten by sparrows and juncos, as well as cardinals, finches, jays and many other birds. These seeds have a number of advantages: they are not overly expensive, they appeal to a wider variety of species, and they contain a larger amount of vegetable oil to help supply the energy birds need to maintain their body heat in the winter. They are also a good source of protein.
  • Cracked Corn
    Cracked Corn is a good, inexpensive food that appeals to a large number of birds, including doves, sparrows, juncos, quail and cardinals, as well as starlings and grackles. Sprinkle the corn liberally right on the ground for larger ground-feeding birds to enjoy.
  • Nyjer
    Nyjer (thistle) seeds are small, oil-rich black seeds typically offered in tube feeders or fine mesh feeders small birds can cling to as they feed. These seeds are tiny but they pack a huge punch for oil and calories, ideal for winter feeding. Nyjer is a favorite of goldfinches, pine siskins and redpolls.
  • Nuts
    Nut meats are highly nutritious and provide necessary amino acids and protein a bird’s body cannot produce. They also have oil and are high in energy. Peanuts are the most popular nuts to offer to backyard birds, but walnuts are also a good option. Avoid using any nuts that are salted or seasoned, however, as they are not healthy for birds.

Other Winter Feeding Tips

Just providing food for winter birds isn’t enough to help your feathered friends stay well-nourished during the coldest months of the year. For the best feeding…

  • Position feeders 5-10 feet away from bushes and shrubs that may conceal hungry predators.
  • Use broad baffles to keep squirrels off feeders and to shelter the feeders from snow and freezing rain.
  • Refill feeders frequently so birds do not need to search for a more reliable food source, especially right before and after storms.
  • Use multiple feeders so you can offer a wider variety of different foods and more aggressive birds cannot monopolize the feeder.
  • Provide water in a heated bird bath so thirsty birds do not have to use critical energy to melt ice and snow to drink.

Feeding birds in the backyard can be a wonderful winter activity, and if you offer the best, calorie-rich foods birds need, you’ll be amazed at how many birds come visit the buffet.


Healthy Soil: Winter Cover Crops

It’s fall and our annual and vegetable gardens are winding down for the season. Now is the time to invest a little extra time and effort to prepare your soil for next year. Whether your garden is large or small, all annual planting beds will benefit from the addition of a winter cover crop.

Benefits of Cover Crops

A cover crop is a fast-growing, low-maintenance crop that can be used to protect your garden and landscaping beds in fall and winter. Depending on the crop you choose, it can provide many benefits to your garden, including…

  • Stabilizing soil and preventing erosion
  • Adding organic matter back into the soil to nurture later crops
  • Adding nutrients to the soil that have been used by previous crops
  • Suppressing disease that can wither new crops even before they start
  • Repressing weeds that will take over a garden
  • Improving soil structure with aeration and better drainage
  • Encouraging beneficial insects that will help later crops

Recommended Cover Crops

Different cover crops work best in different areas, and the climate, soil type and growing season will help determine which cover crops will work best for your gardening needs. The most popular recommended cover crops for our area are oats, rye and wheat.

  • Oats
    Sow 6-8 weeks before the first hard frost. Planted early, oats will provide a quick covering with the added benefit of providing an early planting time for next spring’s crops. Oats are not winter hardy, but they will grow in the fall and die in the winter, leaving behind nutritious mulch that will easily decompose when incorporated into the soil in the spring. This is a great cover crop choice for low- or no-till gardens. Sow at 2 lbs. per 1,000 sq. ft. for the best coverage.
  • Winter Rye
    Sow 2-4 weeks before the first hard frost. This is a good choice for gardeners who have late season crops and don’t want to cut off that last harvest. If hardened off before frost arrives, winter rye will continue to grow over the winter. Rye is a vigorous grower and can be difficult to turn in the spring, so bear that in mind depending on what crops you will be planting in spring. Sow at 3-4 lbs. per 1000 sq. ft. for appropriate coverage.
  • Winter Wheat
    Sow 2-4 weeks before the first hard frost. Wheat will cover quickly but is not as aggressive as winter rye. Winter wheat is also leafier, making it easier than winter rye to turn into the soil in the spring. Sow at 3 lbs. per 1000 sq. ft. to provide good coverage.

Cornell University provides a tool to assist you in choosing the correct cover crop for your situation. (https://cals.cornell.edu/field-crops/about/resources/web-based-tools)

Planting Cover Crops

Before planting a cover crop, clean out garden beds, removing all roots and plant material. Compost all plant matter that is not diseased. Broadcast seed evenly and cover with soil. Water thoroughly when planting and when necessary during dry periods. In the spring, till or fork oats into the planting bed and you are ready to plant. For winter rye and wheat, mow or chop tops 4 weeks before planting leaving cut cover crop on top to dry. Till or fork dried wheat and rye into the bed before planting.

With the appropriate cover crop, you can protect your garden’s most valuable asset – the soil – and be sure it is ready for spring planting.