Monthly Archives: July 2023

Growing and Storing Herbs

Growing herbs, whether inside or out, may be one of gardening’s most gratifying experiences. Because of their beauty and versatility, herbs may be grown amid vegetables, ornamentals or in a garden dedicated strictly to their kind. They may be nurtured in a sunny window box, strawberry pot, whiskey barrel, or just about any container you choose. Situate your herbs for easy access: on the patio, deck, a sunny windowsill, or in the kitchen garden. Herbs are relatively carefree and have a multitude of uses that include but are not limited to: culinary, aromatic, ornamental, medicinal, and insect control.

Herb Growing Tips

Choose a full sun location, 4-6 hours per day is best. Herbs will grow in a shadier location, but plants will be weak and thin. Most herbs are not demanding of soil fertility. One thing that they will not tolerate, however, is wet or poorly drained soil, so be sure not to overwater your herbs.

Locate herbs in or near the kitchen for easy access when cooking. Be aware of the ultimate size, height, and spread of the herbs that you plan to grow. If you take this into consideration you can assure room for the plants to reach their full potential. Position taller herbs to the back of the garden or container and shorter herbs to the front; this will allow for easier access and prevent shading.

Water pots before planting. Remove plants from their pots and loosen roots to stimulate new root growth. Place plants at the same soil depth that they were in the pot, or slightly higher to avoid rotting. Gently firm soil around each plant, water carefully and mulch if desired. Feed monthly with a mild, organic fertilizer.

Some herbs, such as mints, have a tendency to be invasive and may take over an entire herb garden or even spread into the lawn or other parts of the landscape. Sink aggressive potted herbs directly into the garden to minimize this overgrowth. Pull up pots each spring to replenish their soil, then sink the containers back into the garden for another season.

Growing herbs indoors is also quite simple. Choose herbs that will not get too large to handle inside. The same soil requirements apply for both indoor and outdoor planting. Select a south or west window to situate your plants so they receive adequate sunlight. It may be beneficial or necessary to supplement with artificial lighting during the winter months. Provide humidity by grouping plants together and misting daily. Another option is placing potted herbs on a humidity tray. Fertilize monthly to provide the best nutrition.

Harvesting

Fresh herb leaves are ready to be harvested as soon as there is enough foliage to maintain the plant. Try to harvest in the morning, after the dew has dried but before the sun becomes too hot, using a sharp knife or scissors to make each cut. It is a good idea to harvest only what you plan to use at time of cutting, as herbs do not store well in the refrigerator. With most herbs it is beneficial to harvest before the plants go to flower, as the taste is better at this stage of growth. Rinse with cold water and pat dry before using.

Drying

If you have excess herbs, you may want to dry them for future use. After gently rinsing the harvested herbs, drain them on absorbent towels, tie in bunches and dry thoroughly by hanging bunches up in the sun just until all water evaporates from the surface of the herbs. Remove plants from sun and hang in a clean, dark, dry location with good air circulation for 1-2 weeks until herbs are completely dry and brittle. If not dried completely the herbs will become moldy in storage. Remove leaves from the stem and store them in an airtight container in a cool, dry, low light environment. Check container in a few days for condensation. If there is any moisture in the container you must start the drying process again, after checking carefully for any mold or mildew.

You can also dry herbs in a conventional or microwave oven. With a conventional oven, position clean herbs in a single layer on a shallow pan. Place baking pan in a 180°F oven for 2 to 4 hours. When using a microwave, place clean herbs in a single layer on a paper towel or plate. Cook herbs on high for 1 to 3 minutes, rotating the plate every 30 seconds or moving the leaves around on the plate until thoroughly dry. Store these herbs just as you would air-dried herbs.

Freezing

Freezing herbs is also easy to accomplish. Wash herbs and blanch them in boiling water for one minute. Cool herbs very quickly in ice water then drain. Package herbs in airtight plastic bags and store in the freezer.

Herbs can be delightfully easy to grow and they are an even more delightful addition to salads, sauces, pastas, teas, and many other treats you can enjoy year-round.


Crazy for Coneflowers

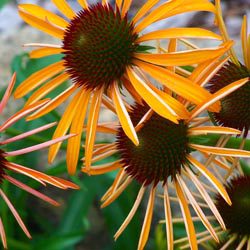
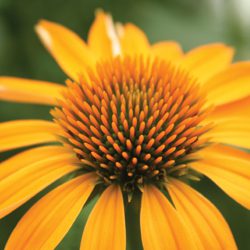
Beautiful and dependable, Echinacea purpurea, or purple coneflower, is the crowning glory of the summer perennial garden. A member of the Aster family, all Echinacea species are native to North America. The genus Echinacea is derived from the Greek ‘echino’ meaning hedgehog, a reference to the spiny center disc flowers.

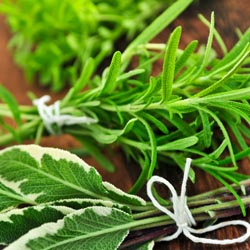
Coneflowers are practical as well as gorgeous. They have long been used as an herbal remedy to stimulate the body’s natural immune system. Both plant roots and tops are used in the production of herbal medicines. Echinacea purpurea has traditionally been used for this purpose, but research is being conducted on the nine other species to determine their usefulness for homeopathic treatments.

Cultivating Coneflowers

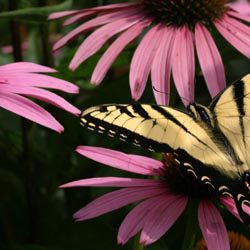
Coneflowers will thrive in a sunny location, planted in well-drained soil. They are tolerant of nutrient-poor soil, heat, and humidity. Echinacea purpurea grows on thick sturdy stems from 3-5 feet tall and generally does not require staking. Coneflowers are long-blooming, the flowers are fragrant and they make a long-lasting cut flower. This is one of the top ten perennials for attracting butterflies to the garden. You may deadhead plants after the blooms have faded to improve their appearance and to encourage a second, but smaller, bloom. You may also leave seed heads in place. In the summer and fall, they attract and provide food for goldfinches and other seed-loving birds. In the winter, the black spent flower heads add ornamental interest as they contrast dramatically with pure white snow.

This perennial is not invasive, but will self-seed if flower heads are left to mature. Cut plants down to the basal foliage, the low growing rosette of leaves, in the spring. Plants should be lifted and divided about every four years or as crowns become crowded.

Where to Place Coneflowers

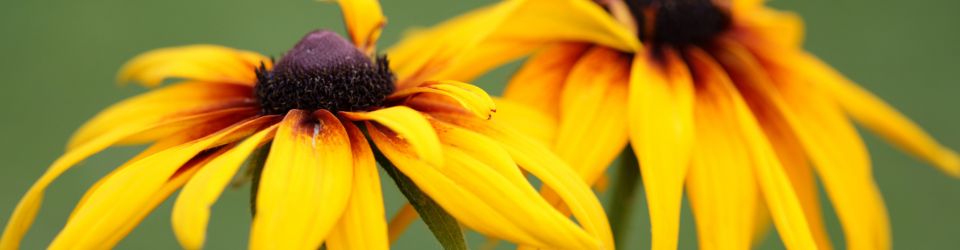
Purple coneflower is a great addition to the back of any sunny perennial border. Its rose-purple flowers, with their coppery-orange centers, look great with ornamental grasses, Black-Eyed Susan (Rudbeckia), and Sedum ‘Autumn Joy’. Appropriate usage ideas include: cottage, meadow, prairie, wildflower, native, and herb gardens, as well as butterfly gardens and any containers that serve similar purposes.

New cultivars of Echinacea are released each year, while popular favorites continue to be top choices. Please stop by often as we continue to provide standard, new, and unusual perennials, including coneflowers!