Monthly Archives: October 2023

Decorating Your Home With Houseplants

Bring the bright atmosphere of a tropical vacation into your home this winter with houseplants. An integral part of your home décor, houseplants not only artistically improve your home, they also cleanse and freshen your indoor air quality. Plants take in carbon dioxide and release clean, pure oxygen. Some plants even absorb certain air toxins, potentially harmful radiation or unpleasant smells. Houseplants also add welcome humidity to the air we breathe, and filter dust particles for a cleaner environment. While houseplants can improve your life in many ways, they must be selected to fit successfully into your lifestyle.

Don’t Consider Light Lightly

When selecting a foliage plant, first determine what type of light you have – this will be the best key to the plant’s health and survival. Look at the area where you would like to keep the plant through the entire day to determine if the light changes. You will also want to keep in mind the time of year – the light will change with different seasons as well as the angle of the sun.

  • Low Light – 3-4 hours of indirect light. Don’t confuse this type of light with no light. If you can sit in the room and read comfortably without turning on a light, it is low light. If you must turn a light on, then it’s considered no light.
  • Medium Light – 4-6 hours of indirect or direct morning sun.
  • High Light – Direct or indirect sun for 6-8 hours a day. Direct afternoon sun in the winter can be too hot for many houseplants. Be careful this time of year because many plants can get sunscald.

No matter what the light levels in different rooms of your home, there are plants that can be comfortable there. If you aren’t sure what your light may be or which plants may thrive, we also recommend you talk to one of our experts about your particular situation for best results.

Low Light Plants

  • Aglaonema
  • Dracaena Warneckii
  • Homolomena
  • Dracaena Janet Craig
  • Pothos
  • Philodendron
  • Spathiphyllum
  • Philodendron Xanadu

Medium Light Plants

  • Corn Plant
  • Norfolk Island Pine
  • Bamboo Palm
  • Ming Aralia
  • Podocarpus
  • Schefflera Amate
  • Spathiphyllum Domino
  • Arboricola
  • Anthirium
  • Ficus Alii
  • Lubersii

High Light Plants

  • Palms
  • Yucca Cane
  • Sago Palm
  • Crotons
  • Fishtail Palm
  • Banana
  • Zamia

A Word About Watering

The smaller the pot, the more frequently you will need to water your houseplant. Small pots (2-3 inches) might need water every day depending on the plant’s needs and the richness of the soil. A 4-6 inch pot may need water every 3-4 days, whereas a 10-inch pot (or larger) usually only requires water every 4-6 days. These guidelines can change depending upon the location of the plant, the type of pot, variety of plant, soil condition, general humidity, time of year and weather conditions. Plants don’t utilize as much moisture on gray days as they do on sunny days.

Because so many factors can impact houseplant watering, determining the watering schedule for large pots (over 10 inches) can be difficult. To help, take a natural wooden dowel and push it into the soil until it reaches the bottom of the pot. After you pull the dowel out, you will be able to see the wetness on the bottom of the stick (if there is any). Also, remember that the larger the pot, the more water will be held in the soil at the bottom – even if there are drainage holes.

Fertilizing

Most foliage or non-flowering houseplants prefer 20-20-20 fertilizer once a month, year-round. You can increase the feeding to twice a month during the growing season. Flowering plants have different fertilizing needs depending on their bloom schedules and growth productivity. Investigate the needs of your individual plants and feed them appropriately.

Houseplants can add great beauty and many benefits to your home. Once you begin choosing houseplants, you’ll soon be enjoying them in every room and every season.
Caring for Orchids

Orchids can be an amazing addition to your indoor landscape, but unfortunately they have a reputation for being finicky and difficult. While they do require precise care, if you know what their needs are, you can easily grow a variety of beautiful orchids and enjoy their exotic loveliness throughout the year. To care for orchids properly…

  • Provide Good Light
    Orchids need at least 6-8 hours of bright indirect light or morning sun. Light is the key with growing orchids – without enough proper light, an orchid may live 20 years but never rebloom.
  • Increase Humidity
    Orchids are tropical and some varieties require 65-75 percent humidity. The plant can sit on pebbles in a water-filled tray that is kept filled up as it evaporates. Grouping orchids can also improve their collective humidity.
  • Adjust Temperature
    Ideal orchid temperatures vary depending on the type of orchid and the time of year. Warm orchids require 55-65 degree temperatures at night with daytime warmth reaching 75-85 degrees. Cool orchids need the same night time temperatures, but only 65-75 degrees during the day.
  • Water Appropriately
    Water the plant every 5-7 days in the sink, as the growing medium has fast drainage. Smaller orchids may need to be watered every 3-4 days. The water should be room temperature and without any additives other than fertilizer.
  • Fertilizing
    Use a Blossom Booster fertilizer with every other watering while in bloom. When not in bloom, use 30-10-10 fertilizer every two weeks.
  • Repotting
    Use only a potting mixture designed for orchids. These mixes are made up of different size fir bark pieces, perlite and even charcoal. Repot your orchid when it is nearly overgrown with roots and is not in bloom. This will average about every 2-4 years.
  • Resting Period
    After blooming or producing new growth, most orchid varieties go into a rest period. Reduce the watering slightly and maintain good lighting to allow them to reenergize.

Blooming Orchids

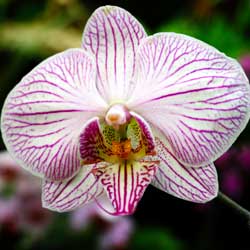
Each type of orchid requires different conditions to bloom (example: Phalaenopsis need 6 weeks of cold nights). When you achieve that delicate balance and your orchid bursts forth with a delicate bloom, make sure you do not change your cultural practices or the plant will abort the buds. Even a small change in humidity, temperature, or light can cause the plant to abort its bloom. But when you keep the conditions stable, you’ll enjoy the reward these exotic flowers offer.


Over-Wintering Container Plants Outdoors

All containerized plants that are considered hardy in your zone can spend the winter outdoors, but you do need to take a little special care to keep them safe and comfortable as temperatures drop. Despite their hardiness, winter is still a challenging season, but it is possible to keep your container plants healthy until the days grow longer and warmer again.

Options to Overwinter Your Container Plants

  • In the late summer or fall, removed the plant from its container and plant it in the ground while the soil is still warm. Another method is to bury the pot, with the plant in it, in the garden and remove the pot the following spring. Both of these methods will help insulate the root system, preventing it from freezing solid and killing the root system.
  • Place containerized plants in an unheated garage but along a heated wall. This is an excellent method for very large pots or porous pots that tend to break apart from the constant cycle of freezing and thawing, and so would not be very hardy if buried. For extra root protection and insulation, wrap the pots in plastic bubble wrap or wrap an old comforter or quilt around the pots.
  • Group pots together along the sunny side of your house or shed. If this area is windy, create a windscreen with stakes and burlap. Place bales of straw or hay around the perimeter of the grouping to further protect plants from cold winds. Fill in areas between pots with mulch, shredded leaves, grass clippings, or hay for insulation. Lay evergreen branches or place a layer of mulch on top of the pots for additional protection.
  • Use a cold frame covered with plastic or Reemay fabric to help control temperatures and reduce light as well, helping plants stay dormant in winter. It will still be necessary to use mulch, shredded leaves, or hay around and in-between pots for insulation. Rodent control, such as Havahart traps, may be necessary when using this method.

Watering Container Plants in Winter

Make sure that plants go into the winter with moist soil so that there is water available to plant roots. Check soil moisture occasionally, never allowing it to dry completely. It is also a very good idea to spray needled and broadleaf evergreens with an anti-desiccant. This acts as a protective coating for plant foliage and stems as it helps them retain moisture.

With just a little care and forethought, you can easily prepare containers for winter without risking the plants and arrangements you have so carefully cultivated.


How To Succeed At Seed-Starting

It’s easy to buy seedlings, but there are many reasons why you may wish to start your own plants. By starting your own seeds, you have a much greater selection of flowers, vegetables, and herbs to choose from. For example, old favorites like hollyhocks and less common varieties of herbs and perennials as well as heirloom vegetables might not be available as plants, or stocks may be limited. Plants with fine seeds should also be started indoors because they can easily wash away in the rain and they may have a difficult time competing with weeds. Starting your own seeds can also help you extend the growing season so you can enjoy a longer, more productive harvest. So why not get started today?

Containers for Starting Seeds

Traditionally, seeds are started in flats or peat pots. You might also use eggshells or folded newspaper pots to start your seeds.

Seed-Friendly Soil

It is best to use a light, soilless mix when starting seeds. These mixes are sterile, meaning young seeds do not have any weed seeds to compete with, and there are no harmful bacteria, insects or other pests in the soil right away. Good seed mixes also contain adequate nutrients to carry seedlings through until transplanting. Do not use garden soil, as seeds will not germinate well in the heavy soil, and a fungus disease called damping off is common.

Temperatures for Seeds

Most seeds require warm soil in order to germinate. You will need to heat the soil of the seedling flats with a heat mat, heat tray, or heating cable. Seed trays can also be placed on top the refrigerator or hot water heater. Do not put seed-starting trays on a windowsill; nighttime temperatures are too cool to allow for good germination. Seeds need consistent warm temperatures of 75 degrees or warmer for optimum germination.

Seed Watering Needs

Seeds need to be kept constantly moist in order to germinate. Moisten the soil thoroughly before planting. Water when the surface is dry with a misting nozzle or plastic spray bottle until the soil is saturated. The medium should be constantly moist, but not soggy. It is important not to overwater, which could drown the seeds and tender seedlings, but also not to permit the flat to dry out.

Sowing Seeds

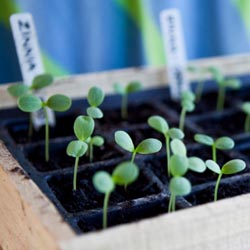
Seeds should be sown 2-10 weeks before the last spring frost date. Your seed packet will provide this information as sowing dates can vary for different plant varieties or even cultivars of the same plants. Fill your containers almost to the top with moist growing mix. Tamp it down gently and smooth it out. Gently press the seeds into the mix or simply set them on the surface of the soil and place milled sphagnum moss over the top to prevent damping off. Cover the container loosely with plastic wrap or a clear dome, which will help preserve moisture and warmth. Be sure to label your containers with plastic or wood plant stakes and write the plant name and the date sowed. Set trays in a warm spot and check daily to keep evenly moist.

Seedling Care

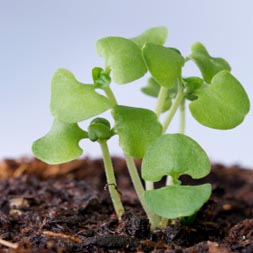
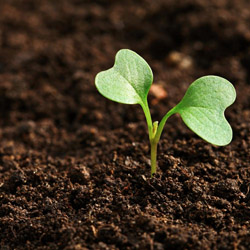
Once seedlings have grown a half-inch or so, you should water less frequently. Let the soil dry slightly between watering, which will help the seedlings stretch and develop a strong root system. Seedlings will also need light and the best method is to use the traditional fluorescent fixtures or the new energy-saving LEDs. Suspend lights just an inch or two away from the plants. Lights must be on at least 14-16 hours a day. As your seedlings grow, raise the lights accordingly so they do not bump into the lighting fixture. If your seedlings do not get enough light, they will become weak and spindly. Fertilize seedlings weekly with half-strength, balanced, organic fertilizer. A fish and seaweed blend works well. Thin seedlings if they become overcrowded, choosing the healthiest, strongest seedlings to save.

Hardening Off and Planting Out

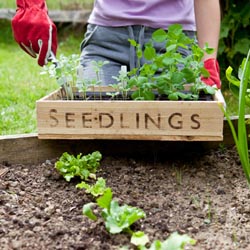
When the weather is warm, move your seed trays outside gradually over a 5-7 day period. Start by putting them out just for a few hours during the late morning to mid-afternoon, and then gradually increase until they are left out all day and night. Keep them in a lightly shaded, protected spot during the day to prevent sunburn. After a week or two of this transition, gently transplant seedlings into the garden. Try not to handle the root ball too much, as they are quite fragile. Water thoroughly after transplanting and again every day for about a week. Newly set out plants will look sparse at first, but they will grow and fill in quickly, leading to bumper crops and a lush, delicious harvest!


Perennial Power

Perennials may not be the best showstoppers in a garden full of annuals, but they make great foundation plantings to serve as a reliable backdrop or trusty fillers among other plants. There’s no reason you can’t select perennials that are just as beautiful as your favorite annuals, however, it’s just a matter of choosing the flowers that pack the most punch and using them appropriately.

Best Perennials to Choose

When choosing a perennial to fill an empty space in your garden, make sure to get the most bang from your buck by selecting one, or several, long-blooming perennials. These flowers will be worthwhile additions to your landscape for their ongoing staying power, giving you a reliable backdrop and structure to build from.

  • Achillea (Yarrow)
  • Anemone (Wind Flower)
  • Asclepias tuberosa (Butterfly Weed)
  • Campanula (clips series)
  • Clematis ‘Jackmani’
  • Coreopsis (Tickseed)
  • Delosperma (Ice Plant)
  • Dicentra exima (Bleeding Heart)
  • Doronicum
  • Echinacea (Coneflower)
  • Gallardia (Blanket Flower)
  • Gaura (Wand Flower)
  • Geranium (the perennial version)
  • Helenium (Helen’s Flower)
  • Heliopsis (Sunflower)
  • Hemerocallis ‘Stella D’Oro’ (Daylily)
  • Hemerocallis ‘Happy Returns’ (Daylily)
  • Kniphofia (Red Hot Poker)
  • Lavender
  • Liatris spicata (Gayfeather)
  • Ligularia (Ragwort)
  • Lobelia cardinalis (Cardinal Flower)
  • Monarda (Bee Balm)
  • Nepeta (Catnip or Catmint)
  • Oneothra ‘Siskiyou’ (Evening Primrose)
  • Perovskia (Russian Sage)
  • Rudbeckia (Coneflower)
  • Salvia (most verticillata)
  • Scabiosa (Pincushion Flower)
  • Shasta Daisy ‘Becky’ or ‘Snow Queen’
  • Stokesia (Stoke’s Aster)
  • Veronica (Speedwell)

Using Your Blooming Perennials

To make your perennials truly pop, it’s important to position them in your landscape where they will show to their best advantage. Popular options include…

  • Filling in between showstopping annuals with perennials that will grow and bloom to cover fading blooms after the annuals are finished.
  • Adding blooming perennials in front of a hedge, fence or privacy screen for extra coverage with a dash of color.
  • Using perennial flowers as a backdrop for lower annual plantings along a house foundation or in other flowerbeds.
  • Creating a naturalized lawn or meadow-like area full of different perennials for a low-maintenance option that still stuns.
  • Planting perennials in hard-to-tend areas, such as alongside a water feature, in tight corners or on terraces so they can be gorgeous with less maintenance.

With so many options for lovely perennials that can be used in many different ways in the landscape, there’s no excuse not to enjoy these easy-care flowers for many years!


Vertical Gardening for Small Spaces

It’s easy to maximize even the tiniest garden space when you look up – and up, and up, and up. Whether you have a balcony, deck, small terrace, raised beds or container garden, vertical gardening is a great way to increase your cultivated ground and enjoy a more abundant harvest no matter how small your garden may be.

Options for Vertical Gardening

What types of vertical gardening techniques you can use will vary depending on the space you have and what you hope to grow, but it is always possible to take your garden up a level or two. Great options for vertical gardening include…

  • Elevated Containers
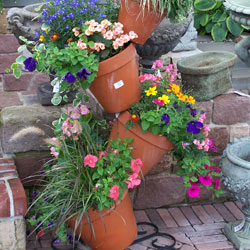
    Containers don’t have to be at ground level to be useful gardening space. Adding window boxes above a flower bed, for example, will give you more space to grow your favorite flowers, herbs or other plants. Some boxes can also be mounted on railings, adding extra growing space to a deck or balcony. Different sizes of pots and containers can be nested together to create a gardening tower perfect for trailing plants.
  • Hanging Containers
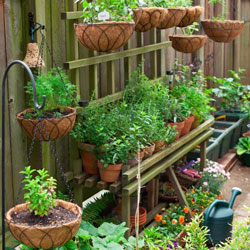
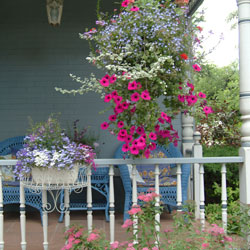
    Think from the top down when you opt for hanging pots or sleeve garden systems as part of your vertical gardening approach. Pots can be hung from hooks along a wall or fence, or may hang from an overhanging roof or the arch of an arbor, and each one is another opportunity to add more plants to your growing space.
  • Trellises
    Train different plants to take advantage of vertical space by providing trellises for them to use as they grow. Many vines and climbing plants will naturally make their way up different supports, whether the trellis is wood, plastic, wire or string. A-frame and teepee-style trellises can provide even more support for heavier plants that require extra help.
  • Green Walls
    A full green wall is a great way to verticalize your growing space, and can even be done indoors if desired. Small pots or creative containers such as rain boots, garden shoes, mason jars, small tin pails or plastic bottles can be attached to a fence or wall, or a pallet can be designed as a vertical gardening space to be hung on a wall to maximize every inch.
  • Arbors
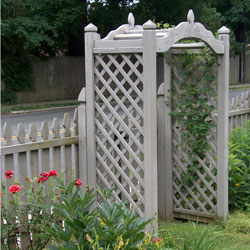
    Arbors and archways can add to your gardening space as well as make a welcoming accent to the area. The sides of an arbor can be used as a trellis, and hooks can be added on the sides and top of an arbor for more hanging pots. Some arbors even have built-in containers for more convenient gardening.
  • Shelf Systems
    Larger than basic containers or planting pots, shelf gardening systems truly make the most of every bit of space by adding extra tiers to the gardening area. These broad gardening shelves are useful for a wide range of plants and seedlings, and are great to add to any smaller garden in need of extra space.
  • Cinderblock Walls
    A cinderblock divider or wall can easily become a fun vertical planter when the blocks are oriented to provide small spaces to use as different pots. Trailing plants are ideal for this type of space as they will drape down and cover the other exposed blocks, and the blocks themselves add visual and textural interest to small spaces.

Plants That Love Vertical Spaces

Any plants that can thrive in containers will do well in vertical gardening arrangements. Popular choices include…

  • Basil
  • Butternut squash
  • Chili peppers
  • Chives
  • Cilantro
  • Cucumbers
  • Garlic
  • Hops
  • Kale
  • Leeks
  • Lettuces
  • Mint
  • Oregano
  • Peas
  • Pole beans
  • Pumpkins
  • Radishes
  • Sage
  • Scallions
  • Spinach
  • Strawberries
  • Sweet potatoes
  • Tomatillos
  • Tomatoes
  • Watermelon

In addition to these delicious edibles, a vertical garden can also be filled in with colorful flowers, ferns, succulents and ivy. These extra plants can help beautify your small space and fill in gaps so every inch of gardening space is richly used.

Make the Most of Your Vertical Garden

To make sure your vertical garden thrives, it is vital to water it properly, as vertical gardens will dry out more quickly than a traditional garden. A watering wand can help water hanging containers or higher vertical spots more easily, and grouping plants with similar watering needs together can make this task easier. Good fertilizer is also essential to be sure plants get enough nutrition to grow properly, but choose the type of fertilizer carefully to support your plants – leafy greens and foliage plants, for example, need a different fertilizer composition than flowers, fruits or vegetables. Use pot feet, casters or wheeled stands whenever possible so you can rotate plants to get even sun exposure or to move vertical gardening arrangements into more suitable locations as seasons change. To help support taller plants, different stakes, cages and other supports can be useful and will help increase your gardening space even further.

Once you start thinking “up”; instead of “out”; for your garden, you’ll be surprised at just how much gardening space you really have, and how many different plants you can enjoy at all different levels.


Low Light Houseplants

Plants brighten up any room, help clean the air and bring a bit of nature inside, but indoor spaces rarely have the same levels of bright, natural light many plants enjoy in their native habitats. Without adequate light, a plant’s foliage may be dull or turn yellow or brown, growth will be slow and flowers may fail to bloom. Choosing low light houseplants is an ideal solution for any indoor space, and there are many beautiful plants that can thrive in a dim environment.

20 Best Houseplants for Low Light

There are many reasons to opt for low light houseplants. Some rooms, such as bedrooms and bathrooms, generally have lower than average light levels. Some homeowners use window shades, blinds or curtains for temperature control, which reduces the light available for indoor plants. Even bright rooms may have dim corners or shadowed spaces where light isn’t as intense. The exposure of any window also affects the sunlight it brings indoors, with north and west windows generally having lower light than south and east windows. Changing seasons also changes how much sunlight comes through any window, with less light available to indoor plants in fall and winter. Fortunately, there are many outstanding houseplants that can grow well in lower light conditions. While the best plants for your home will also vary based on humidity conditions and the care you can provide, houseplants that don’t mind lower light include:

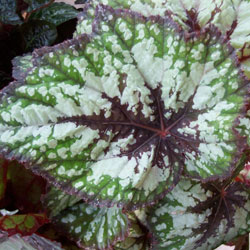
  • Begonia (Begonia)
  • Bromeliads (Aechmea)
  • Cast Iron Plant (Aspidistra)
  • Chinese Evergreen (Aglaonema)
  • Corn Plant (Dracaena fragrans)
  • Dumb Cane (Dieffenbachia)
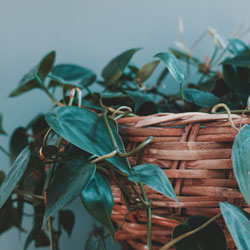
  • Heartleaf Philodendron (Philodendron hederaceum)
  • Lucky Bamboo (Dracaena)
  • Maindenhair Fern (Adiantum)
  • Parlor Palm (Chamaedorea elegans)
  • Peace Lily (Spathiphyllum wallisii)
  • Peperomia (Peperomia)
  • Ponytail Palm (Beaucarnea recurvata)
  • Pothos (Epipremnum aureum)
  • Prayer Plant (Calathea)
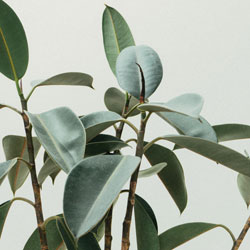
  • Rubber Plant (Ficus elastica)
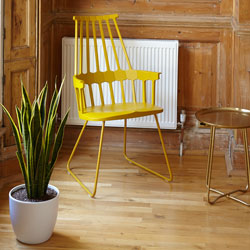
  • Snake Plant (Sansevieria)
  • Spider Plant (Chlorophytum)
  • Sword Fern (Polystichum munitum)
  • ZZ Plant (Zamioculcas zamiifolia)

These are just a few of the most widespread, popular indoor plants that can do well with lower light levels. Check at your local nursery or garden center for additional varieties that are adapted to your region’s climate, especially during the winter months when houseplants are much more widely available.

Caring for Low Light Houseplants

It is important to note that whatever type of houseplant you choose, a designation as “low light” does not mean the plant can thrive in darkness. All plants need some light, but low light plants can still thrive in indirect or filtered light rather than several hours of bright sunlight each day. To give your low light plant the very best indoor habitat, you will also need…

  • A proper pot or other container.
    The pot will need to be the right size for the plant and its anticipated growth, without being too big or too small. Adequate drainage is also essential to prevent root rot and other care difficulties.
  • Suitable soil or potting mix.
    Garden soil has too many contaminants to be good forhouseplants, but there are excellent potting soils available that are specially formulated for plants grown in pots. Add coir, peat or other potting material if necessary to adjust the soil composition.
  • Proper watering.
    Inadequate water and overwatering can both be deadly for houseplants. Know what water your plant needs and adjust the watering schedule based on the plant’s size and seasonal needs throughout the year. Watering gauges or automatic watering tools can help you be sure you aren’t drowning or drying out your houseplants.
  • Regular feeding.
    Because houseplants rely on the same soil and can’t stretch their roots out to seek extra nutrition, regular fertilizing is essential. Choose the proper fertilizer for the plant type and feed gently rather than risk burning delicate roots with overfeeding. Slow-release fertilizers formulated for indoor plants are one of the best options.
  • Increased humidity.
    Indoor air is often much drier than the air outside, and houseplants can dry out more quickly without the proper humidity. Adding a humidifier in a room with houseplants, grouping plants together, misting regularly, and providing a humidity tray are all ways to help.
  • Occasional dusting.
    With no regular breezes to blow away debris, houseplants can become dull and dingy without being dusted, and dust can clog their pores. Use a soft, clean cloth to gently wipe the foliage, or give plants an occasional shower to rinse away unwanted dust.

Every home can be made brighter with houseplants, even in darker rooms where there wouldn’t seem to be enough light. By choosing the right low light houseplants and caring for them appropriately, even a shadowy corner of your home can be a restful bit of nature.


Creating a Backyard Ecosystem

A complete ecosystem can nourish and shelter plants and wildlife alike, and you don’t need extensive acreage or a large lot to create a thriving, healthy habitat. Creating a backyard ecosystem is an easy way to enjoy and support nature right at home.

What is an Ecosystem?

By definition, an ecosystem is a “bubble of life” – a complete biological community interacting with its physical environment. All the components of that community and environment, from soil, rocks, and water to insects, plants, and wildlife are all part of the ecosystem. An ecosystem doesn’t have to be large, and even in one yard there can be several ecosystems, such as a pond, a flowerbed, a thicket, or a vegetable garden.

Components of a Healthy Backyard Ecosystem

A healthy, balanced ecosystem requires several components to thrive. The key features of a backyard ecosystem include…

  • Soil
    Healthy soil is a key for all the plants, insects, and microbes necessary in a thriving ecosystem. Using compost can enrich soil for a healthy ecosystem, and compost is easy to manage in a bin or tumbler system. Testing soil can also help you know how to improve its pH or nutrient composition with the proper amendments or fertilizers as needed.
  • Water
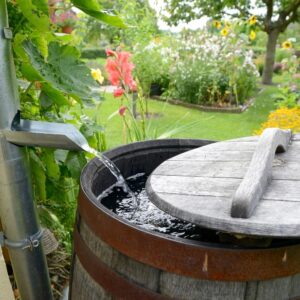
    All ecosystems require water, and a properly managed ecosystem may include built-in irrigation, a drip system, rain barrels, or other ways to manage water. A pond can be a rich part of an ecosystem, while a rain garden with native water-loving plants can use water well. In a drier habitat, xeriscaping with drought-resistant plants is ideal to use water wisely.
  • Plants
    Plants are one of the most visible components of a backyard ecosystem, and native varieties are best because they are already adapted to the local climate and weather conditions. Cutting down on lawn space helps promote a more natural ecosystem, and choosing native, non-invasive plants is key to create a thriving and diverse backyard ecosystem.
  • Wildlife
    All types of wildlife are part of the ecosystem, including birds, bees, butterflies, toads, salamanders, snakes, turtles, squirrels, and more. Welcome wildlife with easy shelter and simple feeding stations. Choose organic fertilizers and soil amendments and opt for native plants that wildlife will more easily recognize and use.
  • Layers
    A thickly layered ecosystem will be more diverse and hardier, with different tiers of plants and wildlife. From groundcover plants to shrubbery of different heights to taller trees, climbing vines, and flowers of all sizes and shapes, tiered ecosystems provide better shelter and more feeding opportunities for insects and wildlife.
  • Shelter
    All wildlife needs safe shelter from storms, extreme temperatures, and predators. Adding a birdhouse, toad house, bee shelter, bat house, owl nesting box, and other wildlife shelters to the yard or garden will encourage these amazing guests to take up residence and add their help and diversity to a backyard ecosystem.
  • Food
    A wide variety of natural foods is essential for a healthy, diverse ecosystem. Plants that produce berries, nuts, grain, and seeds are all great choices, and many other visitors will feed on the insects that live in the ecosystem as well. A supplemental bird feeding station, butterfly feeder, hummingbird feeder, or squirrel feeding station can invite diverse wildlife to the buffet.
  • Death
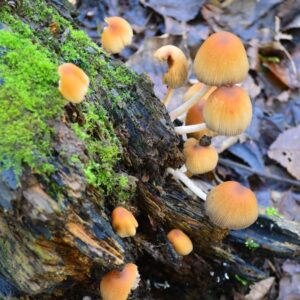
    Death is necessary to nourish life in a healthy backyard ecosystem. Dead trees, snags, and logs should be left intact if possible, so they can be broken down by insects and help return nutrients to the soil. Fungi, moss, and lichens will thrive on dead wood, and many birds and other animals will turn hollow spots into safe nesting sites or protected shelter.

Finding a Balance

It can take time to find a balance for each ecosystem in the yard to encourage a healthy life cycle. Starting with one corner of the yard or garden and gradually expanding throughout the yard can create a diverse, engaging ecosystem that will ebb and flow with each season, bringing great joy and engagement to the entire yard for both the gardener and every living plant and creature the garden supports.


Protecting Trees From Drought Stress

Summer can be the most stressful time of year for landscape plants with heat and drought being the main offenders. When not receiving sufficient moisture, plants are much more susceptible to insect and disease damage. Trees are the most valuable landscape plants and can be the most difficult to replace, so it is sensible that they should be given priority during periods of drought.

Identify Drought Trouble

Lack of water is not a clear indication of a drought when it comes to trees. Many trees have deep, active roots that can easily survive short periods without rain or moisture, but it is important to notice when they are starting to become drought-stressed. Wilting and curling leaves will appear on drought-stressed deciduous trees. Leaf edges will eventually turn brown and crispy and may drop prematurely. Evergreen needles will begin to turn brown at the tips. As the drought continues, the entire needle will turn brown.

Prioritize Which Trees to Help

Generally, the trees most at risk are those that are newly planted or transplanted, as well as any younger trees. The root system of these plants is underdeveloped or has been damaged by the planting. Trees that are growing in a restricted area should also be of greater concern. This includes trees planted in containers, the narrow grass strip between the street and sidewalk, and trees grown adjacent to your house or driveway where they suffer more from reflected heat and have less underground space to spread their roots to collect sufficient moisture. Drought-sensitive plants like birches, beeches, dogwoods, Japanese maples, and magnolias should also be given priority during drought conditions.

Watering During a Drought

It is best to begin good watering practices before the tree succumbs to drought stress. Trees need approximately one inch of water per week. If Mother Nature is not supplying it, then you should.

It is best for the tree if the required water is applied all at one time to the soil, slowly and deeply. This can be accomplished by using irrigation bags on newly planted or small trees. Trees in a restricted area are best watered with a slow dripping hose placed at the base of the tree and moved frequently for even distribution. For larger trees, a soaker hose laid in a spiral pattern, radiating from the tree trunk out to the drip line, works well.

Take care that if your community has watering restrictions during drought conditions, you follow approved practices to maintain your trees without risking fines or fees from illegal watering.

Tips for Helping Drought-Stressed Trees

  • Always water the soil and not the leaves or needles of the tree.
  • 2-4 inches of mulch placed over the soil, under the tree, from the trunk to just beyond the drip line, will help conserve soil moisture. Do not mound mulch against the tree trunk, which can encourage insects.
  • Water on overcast days, early in the morning or in the evening. Evaporation is slower during these times and more water will soak down to the roots.
  • Fertilizer can injure tree roots during times of limited soil moisture. Avoid using fertilizer during drought conditions. If amendments are necessary, choose compost or other gentle options instead of harsher fertilizers.

You can help your trees resist drought conditions with a little thoughtful care, and they will continue to thrive to help provide shade and beauty in your landscape.