Author Archives: Julie

Early Spring Gardener’s Calendar

* Plan your summer vegetable and herb garden. We offer a wide selection of seeds that include all of your favorite annuals, perennials, vegetables and other novelties as well as many hard-to-find selections. Inventory your pots and flats and discard unusable ones. Make a list of the supplies you will need. Have your garden soil tested for nutrient content. We offer a variety of do-it-yourself soil test kits.

* Prune woody plants while dormant, including fruit trees, summer- and fall-blooming shrubs and vines. Limit pruning of spring-blooming trees and shrubs to the removal of sucker growth and rubbing or broken branches. Spray trees and shrubs with year-round horticultural oil to reduce insect population.

* Sharpen, clean and oil tools and lawn mowers. Begin heavy annual pruning of shrub roses as new leaves appear.

* Plant pansies, English daisies and primrose as soon as the earth is workable. Plant strawberry plants. Sow cool-season vegetables and herbs in the garden.

* Start spring cleanup and begin major lawn work. Remove debris, dethatch your lawn or aerate compacted areas to improve water penetration.

* Spray needles and limbs of Arborvitae, Cryptomeria, false cypress, fir, hemlock, Juniper, pine, yew and spruce (except blue spruce) for spider mites with year-round horticultural oil.

* Apply fertilizer to perennials and roses. Feed berry bushes, grapevines, rhubarb and asparagus a balanced fertilizer before new growth begins. Fertilize trees and shrubs.

* Apply crabgrass preventer with fertilizer to feed the lawn and control crabgrass. Do not use on newly seeded lawns.

* Continue spring cleanup. Cultivate to remove winter weeds and debris from the planting beds. Apply corn gluten or a pre-emergent herbicide with fertilizer specified for gardens and scratch it in to prevent future weeds. Do not use in gardens where you will be direct seeding.

* Reseed bare spots in established lawns. Keep the area moist until seedlings appear, then mow when the new grass is 3″ high.

* Prune forsythia and other spring-flowering trees & shrubs after the flowers fall.

* Dig and divide crowded early spring bulbs after they finish blooming. Enrich the soil with bone meal.

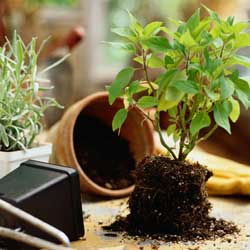
* Plant and transplant trees and shrubs, including roses, ground covers, and perennials.

* Transplant cool-season seedlings into the garden. When the soil temperature reaches 60 degrees, sow warm-season vegetable and herb seeds.

* Place gro-thru sets over peonies, grasses or any other perennials in need of support.



Late Spring Gardener’s Calendar

Turn over your vegetable garden and add humus, mushroom compost or manure to enrich the soil.

Fertilize perennials!

Continue spring cleanup.  Completely remove winter mulch.  Cultivate to remove winter weeds and debris from the planting beds, then edge.  Prepare your annual beds, and mulch landscape beds with shredded mulch, bark chips, or gravel.

Plant and transplant trees and shrubs, including roses, ground covers, and perennials.

Seed or sod new lawns.  Reseed bare spots in established lawns.  Keep the area moist until seedlings appear, then mow when the new grass is 3” high.

Transplant cool-season seedlings into the garden.  When the soil temperature reaches 60 degrees, sow warm- and cool-season vegetable and herb seeds.

Dig and divide crowded spring bulbs after they have finished blooming. Enrich the soil with compost, manure or Espoma Bulb-Tone.

Prune forsythia and other spring-flowering trees and shrubs after the flowers fall.

Place gro-thru sets and link stakes over or around peonies, grasses, or any other perennials in need of support.

Begin summer rose care program of deadheading, fertilizing, and watering.

Deadhead bulbs, but leave foliage to mature and yellow before removing.  This will help nourish the bulb for next year’s flowering.

Dig and divide early blooming perennials after flowering.

Fertilize container plants and window boxes through the spring and summer.

Pay close attention to the watering needs of these plants as well as hanging baskets, because they tend to dry out quickly on hot summer days.


Summer Gardener’s Calendar

Continue planting trees, shrubs, perennials, annuals, vegetables and herbs. Consider adding some exotic color to your deck or patio with tropical blooming plants. We have a great selection of color this summer.

It’s time for your houseplant’s summer vacation! Take outside to a shady place. Repot if necessary, fertilize and check for pests and diseases. They’ll thrive in their outdoor location all summer. Be sure to bring them back inside in early fall.

Water plants and lawns deeply during periods of dry weather. Annuals, perennials, vegetables, trees and shrubs should be watered with a slow trickling or soaker hose. Pay extra attention to plants in containers and hanging baskets – check them regularly. Remember that clay pots dry out faster than plastic.

Apply a 2-3″ layer of mulch on your garden beds in preparation for summer. Mulch conserves valuable moisture in the soil, helps keep weeds down, maintains even soil temperatures, and gives an attractive finishing touch to your beds and borders.

Spray azaleas, Pieris japonica, laurel and Rhododendron with Bonide All-Season Oil to control lacebug. Spray early in the morning or evening when temperatures are moderate and there is no rain in the forecast.
Warm, humid weather encourages the development of fungal diseases such as Black Spot and Powdery Mildew on roses. Water roses in the early morning and avoid overhead watering if possible. Clean up any fallen leaves and follow a regular fungicide spray program. We recommend the Bayer Rose and Flower All in One for good control of fungus diseases.
Prune evergreens such as pines, cypress, hollies, euonymus and boxwood, to shape as needed. Remove faded flowers of annuals regularly, to encourage more flowers. Annuals will also benefit from regular applications of a water-soluble fertilizer right through summer.

Summer Gardener's Calendar

Fall Gardener’s Calendar

SEPTEMBER

Spray Bonide All-Season Spray on hemlocks to control woolly adelgid.

Spruce up the landscape by planting Fall Pansies, Flowering Cabbage & Kale,  Garden Mums,  Fall-Blooming Perennials as well as Trees and Shrubs.

Test your lawn pH to determine if you need to apply lime this season.  A 5o lb. bag of Lime will raise the pH about a half a point per 1000 square feet of turf.

Pick up your Spring Flowering Bulbs like tulips, daffodils, crocus, hyacinths, snowdrops and more!  An Auger for the drill will also help make planting easier.

Plant cool-season salad greens (arugula, corn salad, lettuce, radishes and spinach) in cold frames.

Apply Superphosphate now to coax stubborn plants into bloom next year.

Aerate, re-seed and apply Fall Lawn Food to the lawn.  Keep grass seed damp; water every day if necessary.  You will also want to check for grubs.  Increased activities of skunks, raccoons and moles as well as brown patches that peel back easily are an indication of grub activity.  Apply granular Sevin to control the grubs as well as chinch bugs and sod webworm.

Treat houseplants with Systemic Granules and Concern Insect Killing Soap now to get rid of any insects before bringing them into the house prior to the first frost.

Clean out garden ponds and pools.  Cover with Pond Netting before the leaves start falling.

OCTOBER

Plant bulbs.  Fertilize with Espoma Bulb-Tone and water in well.

Divide daylilies and spring-blooming perennials, including iris and peonies. Don’t be tempted to prune your spring flowering shrubs like forsythia, azaleas, camellia, holly, lilac, rhododendron, spirea or viburnum or you will destroy next year’s buds.

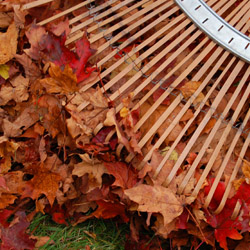
Rake leaves from the lawn and lower the mower blade.  Check your compost pile.  Now is a good time to add Concern Bio Activator to help break down brown leaves and lawn clippings.

Dig up summer-flowering bulbs, such as dahlias, cannas, tuberous begonias, caladiums and gladiolus after the frost kills the top growth.  Treat them with Bulb Dust, pack them in Peat Moss, and store them in a ventilated area for winter.

Fertilize your trees with Jobes Tree Spikes after the leaves fall. Fertilize azaleas, rhododendron, and evergreens with Holly-Tone and other shrubs with Plant-Tone.  Spray hemlock again with Bonide All-Season Spray Oil.

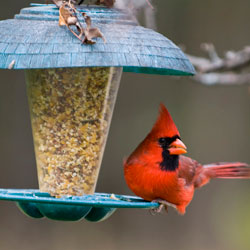
Set up bird feeders.  Clean out birdbaths, refill and purchase heaters for the winter.

Clean up and destroy diseased rose leaves and debris surrounding shrubs and perennials.  Mound 10-12 inches of dirt around roses to protect from winter damage.  After the ground freezes, cover roses with mulch or straw.

Remove annuals, roots and all, and add to your compost pile, but do not add any diseased material to it.

Cut back perennials unless they feature ornamental seed heads and Fertilize with 5-10-5.  Prune long raspberry and rose canes back to a height of three feet.  Clean up your beds and gardens to avoid harboring insects and diseases over the winter.

Pot hardy spring bulbs (anemone, crocus, daffodil, hyacinth, ranunculus and tulip) and place in a cold frame or cool garage (40 degrees) or sink into the ground and mulch.  Keep evenly moist.

Update garden records, noting successes and failures, gaps in planting, future planting and landscape changes.

Water all landscape plants well and mulch before the winter cold sets in.

Spray evergreens, azaleas, rhododendron, boxwood and rose canes with Wilt Pruf for protection against wind and cold weather.

Fall Gardener's Calendar

Holiday Gardener’s Calendar

Winter is upon us. Depending upon the temperatures, there may still be time to finish remaining chores. If you have any questions about the following procedures or products, please come in and see us. We can help you select the correct dormant oil, fertilizer, selective herbicide and frost protection method. We’re always here to help.

General Landscape

  • Mulch with bark, compost or other local materials to enrich soil, protect plant roots and prevent erosion.
  • Protect plants from frost and wind.

Houseplants

  • Perk up tired houseplants by removing dead and dying leaves. Wash under a soft shower in the sink or tub.
  • Spider mites proliferate in warm dry winter homes. Check for mites by looking for tiny speckles on leaves.
  • Transplant if roots are growing through the drainage holes or over the pot edge. If you don’t want to move into a larger pot, untangle the roots and cut back by 1/3, scour the pots and replant with new soil.
  • Remember to turn your plants each week as they begin to grow towards the weaker window light.
  • For indoor bloom, plant amaryllis, paper white narcissus, hyacinth, crocus and indoor cyclamen.
  • Popular holiday plants such as poinsettias, chrysanthemums and orchids fill the stores. Check them thoroughly for “hitchhikers” before bringing into the home or spray with household plant insecticide or soap.
  • Be creative in your arrangements and combine them with metallic painted twigs, pinecones or seashells.
  • If using a live tree for a “living Christmas tree”, prolong its time indoors by using Wilt-Pruf to reduce the loss of moisture from the needles.

Lawn:

  • Remove leaves, toys, hoses, etc, from lawns to prevent dead spots.
  • Apply winter fertilizer, if not already done. The middle number, phosphorus, aids root growth during the winter.
  • If you have weeds in your lawn, consider using a winter fertilizer with weed control.
  • Mow one time after lawn goes dormant and before freezing. This last mowing should be 2 ½” tall.
  • When temps are freezing, stay off the lawn as much as possible to reduce blade breakage.

Vegetables:

  • Protect cool season vegetables with row covers, leaf or mulch cover.
  • Mulch beds to enrich and protect from rain/snow erosion.
  • Review gardening notes and plan next year’s garden.
  • Test germination rate of leftover seeds, if wanting to use again.
  • If gardening under lights or in heated greenhouse, start seeds of early spring crops: lettuce, kale, mustard, spinach, and other greens.
  • Harvest carrots, lettuce, greens and over-wintering crops.

Trees and Shrubs

  • Stake young trees and vines if needed. In case of a heavy freeze, use Wilt-Pruf or similar product to reduce transpiration of moisture.
  • Prevent southeast trunk injury, a form of winter freeze damage. Use light-colored tree guards to protect the trunks of young trees for at least two years after planting. After two years, paint the trunks with white latex paint. These two methods prevent the tree trunk from splitting when sunlight warms the bark on side of the trunk.
  • Fertilize shrubs and trees, if not done already, and the ground is not frozen. This allows roots to absorb when temperatures are above 40⁰ and when spring returns. Granules and spikes provide nutrients effectively and easily.
  • Prune out dead and diseased tree branches to prevent from falling on roof or pedestrians.

Holiday Gardener's Calendar

Winter Gardener’s Calendar

A perfect time to plan! Curl up with your gardening books and the gardening magazines and catalogs you’ve received in the mail. Get out the gardening journal and start dreaming…

General Landscape

  • Clean up when you get a break in the weather. Remove fallen branches and downed evergreen clumps. Rake leaves to prevent stains on concrete and dead patches of lawn. If freezing weather is still in the forecast, leave the mulch in place.
  • If your Christmas tree is still around, set it where the dropping needles will provide mulch, use the branches as additional insulation for perennials, or get together with neighbors to rent a chipper and create wood chips for larger mulch.

Houseplants

  • Perk up tired houseplants by removing dead and dying leaves. Wash under a soft shower in the sink or tub.
  • Spider mites love living in warm, dry, winter homes. Check for mites by looking for tiny speckles on leaves.
  • Transplant if roots are growing through the drainage holes or over the pot edge. Pick up some new, larger, trend-setting, colored pots to perk up your décor. Or, if you don’t want a larger pot, untangle the roots and cut back by 1/3, scour the pots and replant with new soil.
  • Remember to turn your plants each week as they begin to grow towards the window light.
  • Plant a terrarium or miniature garden. If you can’t play in the dirt outside, bring the fun indoors!

Vegetables

  • Plant a short-term cover crop such as Fava beans when soil becomes workable.
  • February: Start vegetable and herb seeds indoors:
Broccoli
Cabbage
Celery
Chard
Eggplant
Kale
Kohlrabi
Leeks
Lettuce
Onions, bulb
Peppers
Radicchio
Scallion
Spinach
Tomatoes
Turnip

General

If you just need a breath of aromatic fresh garden air, stop by and smell ours! The humidity is perfect and will instantly transport you to spring. If you have any questions or need suggestions, we’re here to help. We’d love to see you!


Tips for Layering Bulbs

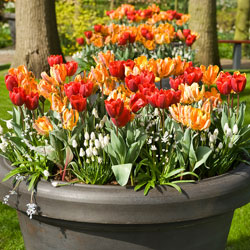
Bulbs are some of the easiest and most dramatic flowers you can add to your landscape and containers, and you can make them even more spectacular when you create layers of bulbs for lush growth and bursts of brilliant color. But how can you go about layering bulbs for the best results?

Why Bother With Layers?

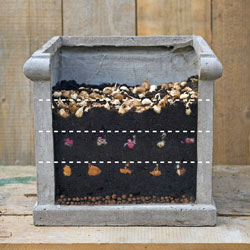
Bulbs are already easy and productive, but they can be so much more when you create bulb lasagna with multiple layers. Layering creates thicker foliage that can serve as great ground cover, and incorporating different types of flowers adds more color variety and textural diversity to the landscape. Layers ensure there are no gaps in your flowerbeds, and can fill in difficult spaces such as tight corners, small pots or narrow areas. This maximizes the use of space in your yard, and when you choose bulbs with overlapping bloom periods, you prolong the flowering season to enjoy beautiful bulbs for many weeks.

Best Bulbs for Layering

Any bulbs can be incorporated into layers, but you will have the best results when you choose bulbs with similar preferences for moisture levels, sunlight exposure and soil type. Depending on the planting depth or size of container you may be using, you can create 2-4 layers, positioning the largest, latest blooming bulbs on the bottom layer and the smaller, earlier bloomers on the top layer closest to the soil’s surface. Popular bulbs for layering include…

  • Bottom (Deepest) Layer: Larger tulips, later daffodils, various lilies
  • Mid-Season Layers: Daffodils, tulips, allium, grape hyacinths
  • Top (Earliest) Layer: Crocus, freesia, snowdrops, scilla

When choosing bulbs for your pots or landscape layering, consider the flower colors and opt for coordinating hues, bearing in mind that the earliest bloomers and latest bloomers are not likely to be seen at the same time. This is a good opportunity to create a color-changing arrangement that will offer continual thrills as the seasons change. At the same time, opt for flowers of different heights for even more textural interest.

Tips to Create Beautiful Bulb Lasagna

When you’re ready to start layering bulbs…

  • Use a deep pot, at least 10-14 inches for two layers of bulbs, and up to 18 inches deep for a triple-layered pot. If you’re planting bulbs in your landscape, be sure the hole is deep enough for all the bulbs you’ve chosen.
  • Amend the soil well with compost, bone meal or bulb booster fertilizer to ensure strong growth for each layer. Because so many bulbs will be competing for the soil’s nutrition, good fertilization is essential, but do not over-fertilize or you may burn delicate bulbs.
  • Space each individual layer slightly wider than you would typically pack bulbs to give lower layers room to grow around upper bulbs, but don’t worry – they will find spaces between each layer and grow through with ease.
  • Provide good drainage in your pot or at the bottom of the hole with sand or gravel so excess water can drain away quickly. This will minimize the risk of root rot, even though a layered pot may require extra watering to hydrate a greater number of bulbs.
  • Deadhead flowers as their blooms die off, but leave their foliage intact. The growing leaves will continue to photosynthesize, adding nourishment to the bulb so it can rebloom the next season. Once the leaves dry and die off naturally, they can be removed.

Layering bulbs can be a great way to create a colorful, long-lasting display. Fast and easy to arrange with little care needed to look its best, you won’t be sorry you experimented with bulb lasagna!


How to Prune Hybrid Tea Roses in the Delaware Valley, PA

Hybrid Tea rose spring pruning is necessary to keep them healthy and blooming abundantly year after year.

Step 1: Timing
– The best time to prune Hybrid Tea roses in the Delaware Valley is in early spring, typically around March when the worst of winter has passed but before new growth emerges.

Step 2: Tools
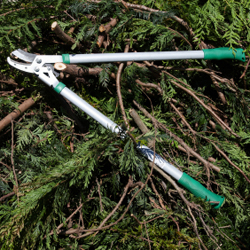
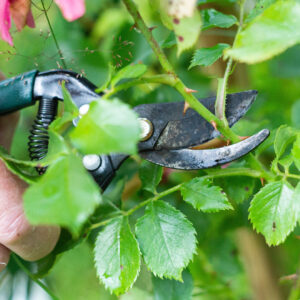
– Gather your pruning tools: sharp bypass pruners, long-handled loppers for thicker stems, sturdy gloves to protect your hands, and disinfectant to clean your tools between cuts to prevent the spread of diseases.

Step 3: Assess the Plant
– Take a good look at your rose bush. Identify any dead, damaged, or diseased wood. These should be removed first to promote overall plant health.

Step 4: Remove Dead/Damaged Wood
– Using your pruners, carefully cut away any dead or damaged wood. Make clean cuts at a 45-degree angle just above a healthy bud or outward-facing node.

Step 5: Shape the Plant
– Next, shape the bush by removing any crossing branches or branches growing towards the center of the plant. Aim for an open, vase-like shape to promote good air circulation and sunlight penetration.

Step 6: Reduce Height
– Hybrid Tea roses benefit from being pruned to about one-third of their original height. Identify strong, healthy stems and prune them back to an outward-facing bud, about ¼ inch above it.

Step 7: Clean Up
– Once you’ve finished pruning, remove all debris from around the base of the plant. Dispose of any pruned material properly to prevent the spread of disease.

Step 8: Mulch and Fertilize
– Finally, apply a layer of mulch around the base of the plant to conserve moisture and suppress weeds. You can also fertilize your roses with a balanced fertilizer to encourage healthy growth and abundant blooms.

Following these simple steps will help you keep your Hybrid Tea roses thriving and looking their best in Delaware Valley gardens.


Decorating Your Home With Houseplants

Bring the bright atmosphere of a tropical vacation into your home this winter with houseplants. An integral part of your home décor, houseplants not only artistically improve your home, they also cleanse and freshen your indoor air quality. Plants take in carbon dioxide and release clean, pure oxygen. Some plants even absorb certain air toxins, potentially harmful radiation or unpleasant smells. Houseplants also add welcome humidity to the air we breathe, and filter dust particles for a cleaner environment. While houseplants can improve your life in many ways, they must be selected to fit successfully into your lifestyle.

Don’t Consider Light Lightly

When selecting a foliage plant, first determine what type of light you have – this will be the best key to the plant’s health and survival. Look at the area where you would like to keep the plant through the entire day to determine if the light changes. You will also want to keep in mind the time of year – the light will change with different seasons as well as the angle of the sun.

  • Low Light – 3-4 hours of indirect light. Don’t confuse this type of light with no light. If you can sit in the room and read comfortably without turning on a light, it is low light. If you must turn a light on, then it’s considered no light.
  • Medium Light – 4-6 hours of indirect or direct morning sun.
  • High Light – Direct or indirect sun for 6-8 hours a day. Direct afternoon sun in the winter can be too hot for many houseplants. Be careful this time of year because many plants can get sunscald.

No matter what the light levels in different rooms of your home, there are plants that can be comfortable there. If you aren’t sure what your light may be or which plants may thrive, we also recommend you talk to one of our experts about your particular situation for best results.

Low Light Plants

  • Aglaonema
  • Dracaena Warneckii
  • Homolomena
  • Dracaena Janet Craig
  • Pothos
  • Philodendron
  • Spathiphyllum
  • Philodendron Xanadu

Medium Light Plants

  • Corn Plant
  • Norfolk Island Pine
  • Bamboo Palm
  • Ming Aralia
  • Podocarpus
  • Schefflera Amate
  • Spathiphyllum Domino
  • Arboricola
  • Anthirium
  • Ficus Alii
  • Lubersii

High Light Plants

  • Palms
  • Yucca Cane
  • Sago Palm
  • Crotons
  • Fishtail Palm
  • Banana
  • Zamia

A Word About Watering

The smaller the pot, the more frequently you will need to water your houseplant. Small pots (2-3 inches) might need water every day depending on the plant’s needs and the richness of the soil. A 4-6 inch pot may need water every 3-4 days, whereas a 10-inch pot (or larger) usually only requires water every 4-6 days. These guidelines can change depending upon the location of the plant, the type of pot, variety of plant, soil condition, general humidity, time of year and weather conditions. Plants don’t utilize as much moisture on gray days as they do on sunny days.

Because so many factors can impact houseplant watering, determining the watering schedule for large pots (over 10 inches) can be difficult. To help, take a natural wooden dowel and push it into the soil until it reaches the bottom of the pot. After you pull the dowel out, you will be able to see the wetness on the bottom of the stick (if there is any). Also, remember that the larger the pot, the more water will be held in the soil at the bottom – even if there are drainage holes.

Fertilizing

Most foliage or non-flowering houseplants prefer 20-20-20 fertilizer once a month, year-round. You can increase the feeding to twice a month during the growing season. Flowering plants have different fertilizing needs depending on their bloom schedules and growth productivity. Investigate the needs of your individual plants and feed them appropriately.

Houseplants can add great beauty and many benefits to your home. Once you begin choosing houseplants, you’ll soon be enjoying them in every room and every season.


Caring for Orchids

Orchids can be an amazing addition to your indoor landscape, but unfortunately they have a reputation for being finicky and difficult. While they do require precise care, if you know what their needs are, you can easily grow a variety of beautiful orchids and enjoy their exotic loveliness throughout the year. To care for orchids properly…

  • Provide Good Light
    Orchids need at least 6-8 hours of bright indirect light or morning sun. Light is the key with growing orchids – without enough proper light, an orchid may live 20 years but never rebloom.
  • Increase Humidity
    Orchids are tropical and some varieties require 65-75 percent humidity. The plant can sit on pebbles in a water-filled tray that is kept filled up as it evaporates. Grouping orchids can also improve their collective humidity.
  • Adjust Temperature
    Ideal orchid temperatures vary depending on the type of orchid and the time of year. Warm orchids require 55-65 degree temperatures at night with daytime warmth reaching 75-85 degrees. Cool orchids need the same night time temperatures, but only 65-75 degrees during the day.
  • Water Appropriately
    Water the plant every 5-7 days in the sink, as the growing medium has fast drainage. Smaller orchids may need to be watered every 3-4 days. The water should be room temperature and without any additives other than fertilizer.
  • Fertilizing
    Use a Blossom Booster fertilizer with every other watering while in bloom. When not in bloom, use 30-10-10 fertilizer every two weeks.
  • Repotting
    Use only a potting mixture designed for orchids. These mixes are made up of different size fir bark pieces, perlite and even charcoal. Repot your orchid when it is nearly overgrown with roots and is not in bloom. This will average about every 2-4 years.
  • Resting Period
    After blooming or producing new growth, most orchid varieties go into a rest period. Reduce the watering slightly and maintain good lighting to allow them to reenergize.

Blooming Orchids

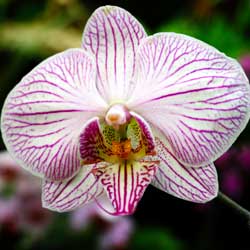
Each type of orchid requires different conditions to bloom (example: Phalaenopsis need 6 weeks of cold nights). When you achieve that delicate balance and your orchid bursts forth with a delicate bloom, make sure you do not change your cultural practices or the plant will abort the buds. Even a small change in humidity, temperature, or light can cause the plant to abort its bloom. But when you keep the conditions stable, you’ll enjoy the reward these exotic flowers offer.