Author Archives: Julie

Tips for Layering Bulbs

Bulbs are some of the easiest and most dramatic flowers you can add to your landscape and containers, and you can make them even more spectacular when you create layers of bulbs for lush growth and bursts of brilliant color. But how can you go about layering bulbs for the best results?

Why Bother With Layers?

Bulbs are already easy and productive, but they can be so much more when you create bulb lasagna with multiple layers. Layering creates thicker foliage that can serve as great ground cover, and incorporating different types of flowers adds more color variety and textural diversity to the landscape. Layers ensure there are no gaps in your flowerbeds, and can fill in difficult spaces such as tight corners, small pots or narrow areas. This maximizes the use of space in your yard, and when you choose bulbs with overlapping bloom periods, you prolong the flowering season to enjoy beautiful bulbs for many weeks.

Best Bulbs for Layering

Any bulbs can be incorporated into layers, but you will have the best results when you choose bulbs with similar preferences for moisture levels, sunlight exposure and soil type. Depending on the planting depth or size of container you may be using, you can create 2-4 layers, positioning the largest, latest blooming bulbs on the bottom layer and the smaller, earlier bloomers on the top layer closest to the soil’s surface. Popular bulbs for layering include…

  • Bottom (Deepest) Layer: Larger tulips, later daffodils, various lilies
  • Mid-Season Layers: Daffodils, tulips, allium, grape hyacinths
  • Top (Earliest) Layer: Crocus, freesia, snowdrops, scilla

When choosing bulbs for your pots or landscape layering, consider the flower colors and opt for coordinating hues, bearing in mind that the earliest bloomers and latest bloomers are not likely to be seen at the same time. This is a good opportunity to create a color-changing arrangement that will offer continual thrills as the seasons change. At the same time, opt for flowers of different heights for even more textural interest.

Tips to Create Beautiful Bulb Lasagna

When you’re ready to start layering bulbs…

  • Use a deep pot, at least 10-14 inches for two layers of bulbs, and up to 18 inches deep for a triple-layered pot. If you’re planting bulbs in your landscape, be sure the hole is deep enough for all the bulbs you’ve chosen.
  • Amend the soil well with compost, bone meal or bulb booster fertilizer to ensure strong growth for each layer. Because so many bulbs will be competing for the soil’s nutrition, good fertilization is essential, but do not over-fertilize or you may burn delicate bulbs.
  • Space each individual layer slightly wider than you would typically pack bulbs to give lower layers room to grow around upper bulbs, but don’t worry – they will find spaces between each layer and grow through with ease.
  • Provide good drainage in your pot or at the bottom of the hole with sand or gravel so excess water can drain away quickly. This will minimize the risk of root rot, even though a layered pot may require extra watering to hydrate a greater number of bulbs.
  • Deadhead flowers as their blooms die off, but leave their foliage intact. The growing leaves will continue to photosynthesize, adding nourishment to the bulb so it can rebloom the next season. Once the leaves dry and die off naturally, they can be removed.

Layering bulbs can be a great way to create a colorful, long-lasting display. Fast and easy to arrange with little care needed to look its best, you won’t be sorry you experimented with bulb lasagna!


Growing and Storing Herbs

Growing herbs, whether inside or out, may be one of gardening’s most gratifying experiences. Because of their beauty and versatility, herbs may be grown amid vegetables, ornamentals or in a garden dedicated strictly to their kind. They may be nurtured in a sunny window box, strawberry pot, whiskey barrel, or just about any container you choose. Situate your herbs for easy access: on the patio, deck, a sunny windowsill, or in the kitchen garden. Herbs are relatively carefree and have a multitude of uses that include but are not limited to: culinary, aromatic, ornamental, medicinal, and insect control.

Herb Growing Tips

Choose a full sun location, 4-6 hours per day is best. Herbs will grow in a shadier location, but plants will be weak and thin. Most herbs are not demanding of soil fertility. One thing that they will not tolerate, however, is wet or poorly drained soil, so be sure not to overwater your herbs.

Locate herbs in or near the kitchen for easy access when cooking. Be aware of the ultimate size, height, and spread of the herbs that you plan to grow. If you take this into consideration you can assure room for the plants to reach their full potential. Position taller herbs to the back of the garden or container and shorter herbs to the front; this will allow for easier access and prevent shading.

Water pots before planting. Remove plants from their pots and loosen roots to stimulate new root growth. Place plants at the same soil depth that they were in the pot, or slightly higher to avoid rotting. Gently firm soil around each plant, water carefully and mulch if desired. Feed monthly with a mild, organic fertilizer.

Some herbs, such as mints, have a tendency to be invasive and may take over an entire herb garden or even spread into the lawn or other parts of the landscape. Sink aggressive potted herbs directly into the garden to minimize this overgrowth. Pull up pots each spring to replenish their soil, then sink the containers back into the garden for another season.

Growing herbs indoors is also quite simple. Choose herbs that will not get too large to handle inside. The same soil requirements apply for both indoor and outdoor planting. Select a south or west window to situate your plants so they receive adequate sunlight. It may be beneficial or necessary to supplement with artificial lighting during the winter months. Provide humidity by grouping plants together and misting daily. Another option is placing potted herbs on a humidity tray. Fertilize monthly to provide the best nutrition.

Harvesting

Fresh herb leaves are ready to be harvested as soon as there is enough foliage to maintain the plant. Try to harvest in the morning, after the dew has dried but before the sun becomes too hot, using a sharp knife or scissors to make each cut. It is a good idea to harvest only what you plan to use at time of cutting, as herbs do not store well in the refrigerator. With most herbs it is beneficial to harvest before the plants go to flower, as the taste is better at this stage of growth. Rinse with cold water and pat dry before using.

Drying

If you have excess herbs, you may want to dry them for future use. After gently rinsing the harvested herbs, drain them on absorbent towels, tie in bunches and dry thoroughly by hanging bunches up in the sun just until all water evaporates from the surface of the herbs. Remove plants from sun and hang in a clean, dark, dry location with good air circulation for 1-2 weeks until herbs are completely dry and brittle. If not dried completely the herbs will become moldy in storage. Remove leaves from the stem and store them in an airtight container in a cool, dry, low light environment. Check container in a few days for condensation. If there is any moisture in the container you must start the drying process again, after checking carefully for any mold or mildew.

You can also dry herbs in a conventional or microwave oven. With a conventional oven, position clean herbs in a single layer on a shallow pan. Place baking pan in a 180°F oven for 2 to 4 hours. When using a microwave, place clean herbs in a single layer on a paper towel or plate. Cook herbs on high for 1 to 3 minutes, rotating the plate every 30 seconds or moving the leaves around on the plate until thoroughly dry. Store these herbs just as you would air-dried herbs.

Freezing

Freezing herbs is also easy to accomplish. Wash herbs and blanch them in boiling water for one minute. Cool herbs very quickly in ice water then drain. Package herbs in airtight plastic bags and store in the freezer.

Herbs can be delightfully easy to grow and they are an even more delightful addition to salads, sauces, pastas, teas, and many other treats you can enjoy year-round.


Crazy for Coneflowers

Beautiful and dependable, Echinacea purpurea, or purple coneflower, is the crowning glory of the summer perennial garden. A member of the Aster family, all Echinacea species are native to North America. The genus Echinacea is derived from the Greek ‘echino’ meaning hedgehog, a reference to the spiny center disc flowers.

Coneflowers are practical as well as gorgeous. They have long been used as an herbal remedy to stimulate the body’s natural immune system. Both plant roots and tops are used in the production of herbal medicines. Echinacea purpurea has traditionally been used for this purpose, but research is being conducted on the nine other species to determine their usefulness for homeopathic treatments.

Cultivating Coneflowers

Coneflowers will thrive in a sunny location, planted in well-drained soil. They are tolerant of nutrient-poor soil, heat, and humidity. Echinacea purpurea grows on thick sturdy stems from 3-5 feet tall and generally does not require staking. Coneflowers are long-blooming, the flowers are fragrant and they make a long-lasting cut flower. This is one of the top ten perennials for attracting butterflies to the garden. You may deadhead plants after the blooms have faded to improve their appearance and to encourage a second, but smaller, bloom. You may also leave seed heads in place. In the summer and fall, they attract and provide food for goldfinches and other seed-loving birds. In the winter, the black spent flower heads add ornamental interest as they contrast dramatically with pure white snow.

This perennial is not invasive, but will self-seed if flower heads are left to mature. Cut plants down to the basal foliage, the low growing rosette of leaves, in the spring. Plants should be lifted and divided about every four years or as crowns become crowded.

Where to Place Coneflowers

Purple coneflower is a great addition to the back of any sunny perennial border. Its rose-purple flowers, with their coppery-orange centers, look great with ornamental grasses, Black-Eyed Susan (Rudbeckia), and Sedum ‘Autumn Joy’. Appropriate usage ideas include: cottage, meadow, prairie, wildflower, native, and herb gardens, as well as butterfly gardens and any containers that serve similar purposes.

New cultivars of Echinacea are released each year, while popular favorites continue to be top choices. Please stop by often as we continue to provide standard, new, and unusual perennials, including coneflowers!


Watering: How Much?

Water is critical for a healthy garden and landscape, but how much water is too much, how much isn’t enough and how much is just right? Unfortunately, there isn’t a specific answer that suits every gardener’s needs. All plants have different water requirements, which change depending on the type of soil, amount of sun, temperature, humidity, season, maturity of the plant and overall growing environment.

Initial Watering

All plants, including specimens described as drought tolerant, will require water when first planted. This is because many of the smaller roots responsible for water uptake are usually damaged during shipment and planting. Build a small circular soil wall around the plant to contain water while it percolates into the soil. Watch new plants carefully and keep them well-watered as their roots settle in and they adapt to their new or transplanted location.

Groups Are Good

It’s a good idea to have some knowledge of the plant’s water requirements when determining the location in the garden. It will keep watering simple if you plant a new specimen near other plants with similar water requirements. In this way, there is no need to readjust an irrigation system or watering schedule, since all the plants in the group have similar needs.

Need a Drink?

Because plants’ watering needs can change through the season, how can you tell if a plant needs more water? Most plants will wilt as the soil becomes too dry. The leaves may droop, and if it’s an upright plant, the top ends may become soft and bend over. Glossy plants may begin to look dull, while thick leaves will shrivel. If you notice these signs, it is time to water! Most plants will revive if watered quickly enough, but be sure to water deeply rather than allowing moisture to run off the surface.

How can you tell if you should water? Push your finger into the soil an inch or two from the base of a plant. Perfect soil should feel cool and slightly moist. Some soil should stick to your finger. If none does, it’s too dry. If it’s muddy, don’t water. Overwatering kills plants by depriving the roots of oxygen. Some gardeners use water meters to see the precise amount of moisture. If you’re unsure, this tool can be helpful.

Adjusting Your Watering Schedule

The amount you have to water your plants or landscape can change from day to day. A cool morning will allow more dew to form and drain to the soil, or a sudden afternoon thunderstorm can be enough water to keep your plants hydrated for a few days. An overly hot day, however, can rapidly deplete water resources and extra watering may be required. Check your plants and landscape regularly to be sure they are getting adequate water, and make adjustments as needed to keep them suitably moist without either too much or too little water.

Need help monitoring water? Stop by to see our collection of water gauges, meters and monitors that can help you be sure you are watering your landscape correctly.


Ornamental Grasses

Ornamental grasses can reduce your watering costs, lessen your mowing time and increase the interest level of your garden. No matter what your garden’s needs, there’s a grass to solve it.

About Ornamental Grasses

Generally defined as “a plant with narrow upright leaves growing from the base,” ornamental grasses come in different sizes, shapes, colors and with differing growing requirements. While they may be cut to the ground each year, they are not mowed regularly, and work well as borders, specimen plants or part of coordinated beds. When choosing an ornamental grass for your site, consider the following:

  • Size
    Some beautiful grasses are just inches tall. Others can grow several feet high. A shorter grass is a perfect edge for a walkway or to border a flowerbed, while a taller grass provides screening or background height.
  • Deciduous or Evergreen
    The winter form of a grass can be very different from its summer form. Evergreen grasses do not die back in the winter, their form remains the same. Winter colors may change and provide interest. Deciduous grasses die back or lean over. Consider the plant’s use when choosing between deciduous and evergreen. If using a grass as a screen, deciduous may not be a good idea.
  • Running or Clumping
    Clumping grasses stay where they planted, and as they grow, the overall plant width increases. However, a running grass sends runners through the ground to grow another grass plant. Sometimes this can be up to 6 feet away. This is advantageous when using the grass as a groundcover or trying to fill in a larger area. Clumping grasses can be divided if they become too large for the site.
  • Color
    Ornamental grasses are available in many colors, including variegated shades with contrasting edges. Additionally, many grass colors change throughout the year. Blues, reds, greens, yellow and variegated shades work well in different situations. A gold or white-hued grass can brighten a dark corner, whereas a dark green grass may be a perfect backdrop for smaller colorful plants.
  • Growing Requirements
    Sun, water, wind and soil requirements vary among grasses. Some require full sun; others grow best in the shade. Some grasses are ideal in rain gardens or wet soils, while others thrive best in drought conditions. Some don’t mind a breezy location, while others need to be more protected. Some prefer a rich, organic soil, while others will look great even in poor soils. And, of course, there are grasses for every range in between.

Before going to the garden center to purchase an ornamental grass, make a list of your requirements. You may want a short grass to line a walkway in full sun with sandy soil. Alternatively, you may need a grass to fill a dry and shady corner. Perhaps you would like to watch a grass clump emerge in the spring, grow to 6′ tall, change colors through the summer and harvest dry seed heads for an autumn arrangement. Choosing the correct grass ensures the beauty of your garden for years to come.


Growing Veggies in Containers

Do you dream of a delicious, homegrown harvest but don’t have the land to use? No longer should a shortage of garden space prevent you from growing your own fresh vegetables. As long as you have a sunny location you can have your own mini-farm on your porch, patio, deck, balcony, roof-top or doorstep!

Why Use Containers?

The benefits of growing containerized vegetables go beyond the issue of space. There are plenty of other compelling reasons to plant your veggies in pots, including…

  1. Vegetables are amazingly ornamental and can be just as decorative as any other container plants or flowers.
  2. There are fewer problems with pests such as groundhogs, deer and rabbits and soil borne diseases.
  3. The soil in pots warms up more quickly in the spring allowing for earlier planting and an extended growing season.
  4. Less bending, squatting and kneeling is required for gardeners with limited mobility.

Vegetables can be grown in any vessel that can hold soil, has adequate drainage and is large enough to hold a plant. There are endless options available on the market or you may recycle items that you already have as long as they meet these requirements. Use your imagination – try a wheelbarrow, wine barrel or just a plastic bin, and you’re ready to plant!

Best Vegetables for Containers

While all veggies can be grown in containers, some are better suited than others. Plants that grow particularly large, that sprawl or that must be grown in large numbers to ensure an adequate yield may take more effort and careful site planning with an adequate container. Similarly, vining plants need not be avoided. Trellis these plants up against a wall or fence or allow them to cascade down from a taller pot or a container placed up high like on a stone wall. For smaller selections, a hanging basket or window box may be used. Many sprawling and vining vegetables are now available by seed in dwarf, compact or bush varieties. These are bred specifically for small spaces and containers and are worth seeking out.

Tips for Container Vegetable Gardens

Growing vegetables in containers does take some unique thought and isn’t quite the same as planting in a traditional garden. When planning your delicious container garden, consider…

  • Containers: Size matters when planting in containers. The bigger the container, the more soil it can hold. More soil more and more moisture means less watering. Take note that porous containers like terra cotta dry out more quickly and will therefore require more frequent watering.
  • Soil: When planting, choose a good quality potting mix. Soil from the ground may contain insects or disease or may be too heavy. Add an all-purpose balanced fertilizer at time of planting. It is also good idea to mix water absorbing polymers into the soil. These granules can hold up to 400 times their weight in water and help reduce watering from 30-50 percent.
  • Plants: Some of the vegetables that you select may be directly seeded into your container; these would include peas, beans, radishes and corn. With most vegetables you may wish to transplant seedlings into your container, either home-grown or garden center purchased. You will generally find a wider selection of vegetable varieties and unique options available in seed as opposed to purchased seedlings, if you want to use your containers experimentally.
  • Supports: Supports should be placed at time of planting for large or vining plants. This will ensure the young plants are not disturbed or damaged with supports added at a later time. If the supports are outside the container, however, they can be added only when they are needed.
  • Location: Your vegetables will require at least 6 hours of direct sun a day. If this is not possible you may try placing your pots on dollies or carts and moving them to a sunnier location as the sun moves throughout the day. Note that good air circulation is important for disease control.
  • Watering: Test soil frequently for water to make sure that you keep it evenly moist. Water the soil, not the plants, to avoid the spread of disease. Check soil moisture more frequently during the summer months when evaporation is faster. Mulching your containers with salt hay or grass clippings will help keep soil cool during the summer months and reduce the frequency of watering. If possible, a drip system can be a great option for keeping containers watered.
  • Fertilization: Fertilizer leaches through pots quickly. Fertilize containerized vegetables at least once a week with a water soluble fertilizer. Always be careful to follow the directions on the fertilizer package and follow the recommended rate. Too much fertilizer may burn or kill your plants, but too little will result in undernourished, underperforming plants.

With appropriate care that caters to the needs of containers, your small-scale vegetable garden can be just as lush and productive as any larger, more intensive space, and you’ll soon have a bountiful harvest to enjoy.


The Urban Jungle

No matter what the size or style of your own personal urban habitat, you can add stunning nature with the right houseplants. Furthermore, when you grow your own urban jungle, you can realize and enjoy all the benefits houseplants bring to your home.

Benefits of Urban Houseplants

Houseplants bring a range of benefits into any home with every leaf and bloom. Not only do plants improve oxygen levels by drawing carbon dioxide from the air, they also remove other pollutants and odors, particularly in smaller urban homes where airborne toxins may be more concentrated. Houseplants also lower dust levels and improve humidity indoors, which can help alleviate allergies, respiratory conditions, dry skin, and other health problems. Larger houseplants help dampen unwanted sounds, creating a more tranquil atmosphere. Studies have also shown that houseplants improve mood and relaxation by providing a tangible connection to nature, which can help reduce depression and Seasonal Affective Disorder. With so many benefits, adding even one or two houseplants to your home can help create more positive, enjoyable surroundings, and a full urban jungle can become your sanctuary in the city.

Best Plants for an Urban Home

There are many types of houseplants to choose from, any of which will bring numerous benefits to your home. Before choosing, however, consider the levels of sunlight in your home, as well as changing light levels throughout the year, to be sure you can provide adequate light for a particular plant to flourish. Overall room temperatures can also affect plants, as some thrive in cooler climates while others prefer warmer rooms. Note the available space you have and choose a plant that won’t soon become crowded or cramped, which can inhibit growth. Also be aware of the ongoing care each plant will need and whether your schedule will permit you to maintain the plant well, or if you need a plant that is a bit more forgiving of neglect.

The top houseplants that thrive in urban households include:

  • African violets
  • Cacti
  • Cast iron plant
  • Dracaena species
  • Dumb cane
  • Ferns
  • Golden pothos
  • Lucky bamboo
  • Peace lily
  • Snake plants
  • Spider plants
  • Succulents

Depending on the size of your home and how green your thumb is, you may choose to start with just one or two houseplants, or you could opt for an entire jungle. Ideally, one medium-sized houseplant is best for every 100 square feet of living space to keep the air clean, but you can have as many or as few plants as you wish for your happiness.

Caring for an Urban Jungle

It is easy to keep houseplants lush, but they do need dedicated care to stay healthy.

  • Choose a Proper Pot – The pot should be the right size for your houseplant. A too-small pot will cramp the plant and inhibit growth, while a too-large pot will encourage overgrowth and legginess on different plants. The pot should also have suitable drainage to keep the root system healthy and avoid rot.
  • Use Good Quality Soil – Rather than outdoor soil that may not be as rich and could bring pests into your home, opt for a good quality potting mix formulated for houseplants. These mixes will often have moisture-retention beads or fertilizer pre-mixed into the soil, making houseplant care easier. You can also look for specialty blends for cacti, succulents, flowering plants, and other specific types of houseplants.
  • Water Appropriately – Overwatering or underwatering can be deadly for houseplants. Check your plant’s specific watering needs and adjust watering as needed for different seasons. Choosing self-watering pots or using globe watering stakes can also help keep a houseplant safely watered.
  • Feed Regularly – Houseplants need occasional fertilizer applications to supplement the nutrition they draw from their potting soil. Choose a liquid fertilizer formulated for your specific plants and follow application instructions on the product label. Most houseplants’ nutritional needs are reduced during the winter months.
  • Provide Sufficient Light – Different houseplants have different sunlight needs. Some will do very well in shadier spots, while others need filtered light or even a few hours of bright sunlight. Moving plants to different locations in different seasons can help them get adequate light and rotating the pots will help plants grow straight without stretching to reach the sun.
  • Position Safely – Place houseplants away from hazardous situations such as areas where they may be accidentally tripped or tipped over. Avoid creating your urban jungle near heating or cooling vents and cold winter drafts. Keep houseplants out of reach of pets that may nibble on leaves or dig in pots.
  • Prune as Needed – Keep your urban jungle looking tidy by pruning and trimming plants to maintain their shapes or remove dead leaves. Brown tips can also be trimmed for a neater appearance but avoid vigorous pruning that could stress the plant.
  • Watch for Pests – Fungus gnats, mealybugs, spider mites, and other pests can invade even the most well-protected urban jungle. Stay alert for any pests and take steps immediately if they do appear. Plant-friendly insecticidal soaps, top dressing treatments, neem oil, and other control options are available depending on which pests are present.
  • Clean Your Plants – Refresh houseplants and brighten your urban jungle with regular cleanings. Dust, dirt, and other debris can gather on plants’ foliage, clogging respiratory pores and dulling the plants’ color. A quick rinse in the shower or regular dusting with a moistened cloth and a gentle hand can keep plants looking their best.

Your urban jungle can bring you many benefits, whether you just have one or two houseplants, a simple plant collection, or an elaborate nature sanctuary in your home. By choosing the best plants for urban living and providing them with proper care, they will in turn nurture you and help you reconnect with nature, no matter where you live.


What Is the Difference Between an Annual, a Perennial, and a Biennial?

All living creatures, including plants and flowers, have expected lifespans. Recognizing the differences between annuals, perennials, and biennials can help you determine the life expectancies of different garden center plants so you can choose the varieties that will work best in your garden, landscape, and containers.

Annuals

Annual plants are fairly straightforward. These plants complete their entire lifespan in just one year or growing season, from first sprouting from seeds and growing foliage, stems, and blooms to creating seeds to continue the next generation. After the plants die, they will not regrow from their initial roots, but must restart from seeds again as completely new plants. Annuals are generally faster growing and have longer bloom seasons, making them colorful showstoppers in the garden and landscape.

Common and popular annuals include…

  • Begonias
  • Cosmos
  • Impatiens
  • Marigolds
  • Petunias
  • Zinnias

In addition to many popular flowers, most garden vegetables are also grown as annuals, though some of them would botanically be classified as perennials if they were allowed to remain in place for multiple years.

Perennials

Perennial plants are those with a lifespan that lasts at least three years, though they can live significantly longer as well. Perennial foliage may die back during the winter months but will regrow from dormant roots the next season. These plants often take longer to mature and may have shorter blossom times than annuals, but they can provide many years of beauty in the landscape.

Familiar perennials include…

  • Coneflowers
  • Coral bells
  • Daylilies
  • Peonies
  • Phlox
  • Sedum

In addition to these elegant and popular flowers, hedges and trees are also perennials. These plants are staples in the yard and provide a foundation for any landscape.

Biennials

Biennials fall between annuals and perennials with a two-year life cycle. During their first year, these plants establish leaves, roots, and stems. Though they may die back slightly over the winter, they will rejuvenate in the spring and grow flowers in their second year, maturing to seeds before the plants die completely.

Familiar biennial flowers include…

  • Canterbury bells
  • Columbine
  • Dame’s rocket
  • Forget-me-nots
  • Foxglove
  • Hollyhocks

Because these plants do not bloom in their first year, patience is essential to enjoy their beauty in their second year. Planting biennials in two successive years can ensure the plants enhance the landscape in multiple years.

Choosing Annuals, Perennials, and Biennials for Your Yard

Once you understand plant lifespans, you can more easily choose the plants that will give you a landscape you love. When choosing plants, larger perennials can create a stunning foundation or border for your yard, including showstopping specimen plants and shade trees. Smaller perennials can fill in larger spaces in flowerbeds and edging, while annuals add brilliant color to pathways, edges, and very visible spaces, including porch pots and containers.

Biennials can be spectacular transition plants, particularly if you may plan on expanding your landscaping beds in the future, or want to fill in a space temporarily before adding a new deck, porch, or otherwise expanding your home or outdoor living space. Biennials are also great choices if you want to enjoy a changing landscape without as much work each year, because you can enjoy the plants for two years before they need replacing. Many biennials are self-seeding making them great additions to the cottage garden.

Ultimately, a landscape that includes a thoughtful mix of annuals, perennials, and biennials will showcase different colors, textures, and growth patterns for stunning visual interest. New cultivars are developed every year, and greenhouses often have the latest plants and newest showstoppers on display. If you plan a mixed landscape, you will have the freedom to enjoy new plants as they are introduced and you will always have new plants to be excited about.

Caring for Annuals, Perennials, and Biennials

While the differences between annuals, perennials, and biennials may seem clear, different plants can have different lifespans based on the exact cultivar, gardening zone, climate variations, and even microclimates within an individual landscape. Furthermore, the care plants receive can ensure they reach their maximum potential for the longest, most productive life. YOUR GARDEN CENTER (insert IGC here) experts can provide recommendations and guidance for the best plants based on your preferences and needs and assist you in choosing plants that will thrive in the conditions of your yard, including soil type, sunlight levels, fertilization, moisture levels, and other needs. To provide each type of plant the best care, consider…

  • Annuals – Provide nourishing fertilizer formulated for the type of plant, and weed around them carefully so these fast-growing plants don’t need to compete for moisture and nutrition. Soaker or dripper hoses can also provide great watering as these plants flourish.
  • Perennials – Be sure these plants have adequate space in the landscape to reach their full size. Good quality mulch can help protect the roots each winter so the plants remain healthy for the next spring.
  • Biennials – Take care to provide appropriate fertilizer for these plants in their different life stages, and mulch around those with basal leaves to provide good winter protection during their dormancy.

Adding annuals, perennials, and biennials to your landscape will not only help you learn about plant lifespans, but you will enjoy a more varied and richly diverse landscape, with plants that provide beauty through the years.


Early Spring Gardener’s Calendar

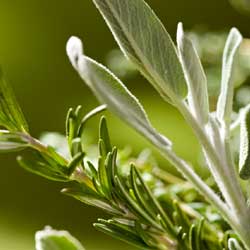
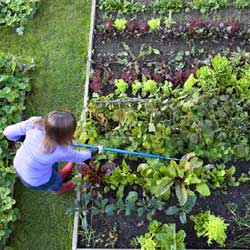
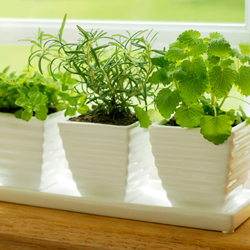
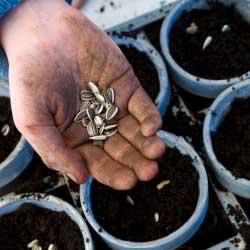
* Plan your summer vegetable and herb garden. We offer a wide selection of seeds that include all of your favorite annuals, perennials, vegetables and other novelties as well as many hard-to-find selections. Inventory your pots and flats and discard unusable ones. Make a list of the supplies you will need. Have your garden soil tested for nutrient content. We offer a variety of do-it-yourself soil test kits.

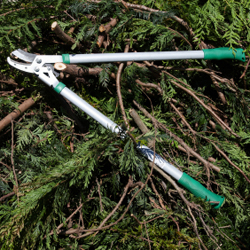
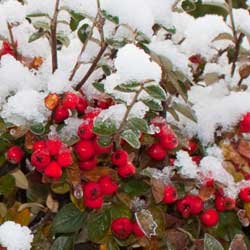
* Prune woody plants while dormant, including fruit trees, summer- and fall-blooming shrubs and vines. Limit pruning of spring-blooming trees and shrubs to the removal of sucker growth and rubbing or broken branches. Spray trees and shrubs with year-round horticultural oil to reduce insect population.

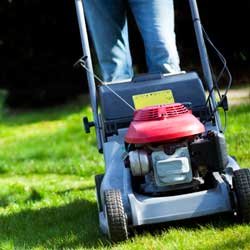
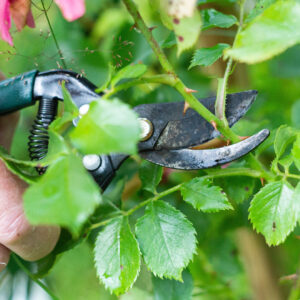
* Sharpen, clean and oil tools and lawn mowers. Begin heavy annual pruning of shrub roses as new leaves appear.

* Plant pansies, English daisies and primrose as soon as the earth is workable. Plant strawberry plants. Sow cool-season vegetables and herbs in the garden.

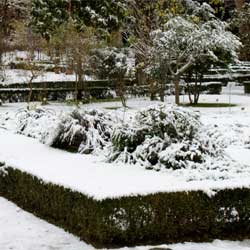
* Start spring cleanup and begin major lawn work. Remove debris, dethatch your lawn or aerate compacted areas to improve water penetration.

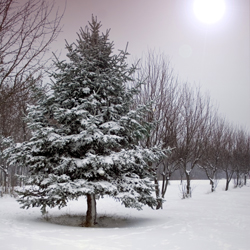
* Spray needles and limbs of Arborvitae, Cryptomeria, false cypress, fir, hemlock, Juniper, pine, yew and spruce (except blue spruce) for spider mites with year-round horticultural oil.

* Apply fertilizer to perennials and roses. Feed berry bushes, grapevines, rhubarb and asparagus a balanced fertilizer before new growth begins. Fertilize trees and shrubs.

* Apply crabgrass preventer with fertilizer to feed the lawn and control crabgrass. Do not use on newly seeded lawns.

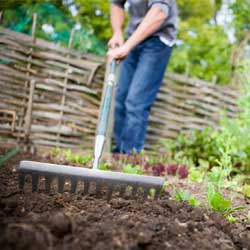
* Continue spring cleanup. Cultivate to remove winter weeds and debris from the planting beds. Apply corn gluten or a pre-emergent herbicide with fertilizer specified for gardens and scratch it in to prevent future weeds. Do not use in gardens where you will be direct seeding.

* Reseed bare spots in established lawns. Keep the area moist until seedlings appear, then mow when the new grass is 3″ high.

* Prune forsythia and other spring-flowering trees & shrubs after the flowers fall.

* Dig and divide crowded early spring bulbs after they finish blooming. Enrich the soil with bone meal.

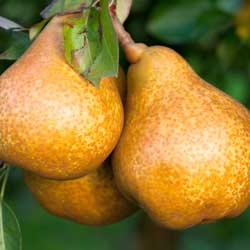
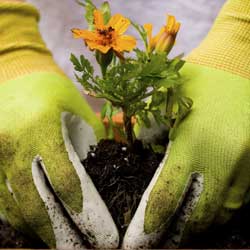
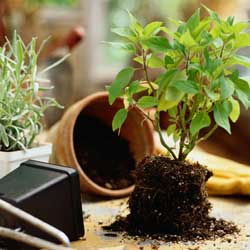
* Plant and transplant trees and shrubs, including roses, ground covers, and perennials.

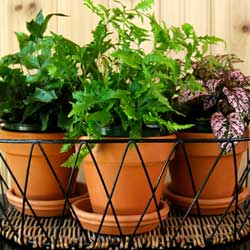
* Transplant cool-season seedlings into the garden. When the soil temperature reaches 60 degrees, sow warm-season vegetable and herb seeds.

* Place gro-thru sets over peonies, grasses or any other perennials in need of support.


Growing Under Black Walnut

If you have a black walnut tree on your property, you know how difficult it can be to find anything that will grow anywhere near this plant.

Black walnuts release a substance called juglone into the soil, which is toxic to many ornamental and edible plants and can stunt their growth significantly – in fact, juglone is used as a herbicide in some areas! A mature black walnut tree can have a toxic zone with up to an 80-foot radius, depending on the tree’s size and age. Every part of the walnut tree contains juglone and this substance remains in the soil long after the tree is cut down, continuing to inhibit anything that may be planted in its place.

Fortunately, there is a wide variety of plants that are less affected by juglone and can still thrive in contaminated soil. When choosing to plant in an area where a black walnut is located or where one once stood, it is safe to make your selection from the lists below.

Vegetables

  • Beans
  • Corn
  • Carrots
  • Melons
  • Squash

Fruit

  • Black Raspberry
  • Cherry
  • Nectarine
  • Peach
  • Pear
  • Plum

Annuals

  • Pot-marigold, Calendula officinalis
  • Begonia, fibrous cultivars
  • Morning Glory, Ipomoea
  • Pansy, Viola
  • Zinnia species

Perennials

  • Bugleweed, Ajuga reptans
  • Hollyhock, Alcea rosea
  • European Wild Ginger, Asarum europaeum
  • Astilbe species
  • Bellflower, Campanula latifolia
  • Leopard’s-Bane, Doronicum species
  • Sweet Woodruff, Galium odoratum
  • Cranesbill, Geranium sanguineum
  • Common Daylily, Hemerocallis
  • Coral Bells, Heuchera
  • Plantain-lily, Hosta
  • Siberian Iris, Iris sibirica
  • Balm, Monarda didyma
  • Sundrops, Oenothera fruticosa
  • Summer Phlox, Phlox paniculata
  • Polyanthus Primrose, Primula x polyantha
  • Lungwort, Pulmonaria species
  • Showy Sedum, Sedum spectabile
  • Lamb’s-Ear, Stachys byzantina
  • Spiderwort, Tradescantia virginiana
  • Horned Violet, Viola cornuta

Ferns

  • Crested Wood Fern, Dryopteris cristata
  • Senstitive Fern, Onoclea sensibilis
  • Cinnamon Fern, Osmunda cinnamomea

Bulbs

  • Glory-of-the-Snow, Chionodoxa luciliae
  • Crocus species
  • Winter Aconite, Eranthis hyemalis
  • Snowdrop, Galanthus nivalis
  • Spanish Bluebell, Hyacinthoides hispanica
  • Grape Hyacinth, Muscari botryoides
  • Siberian Squill, Scilla sibirica

Trees

  • Japanese Maples, Acer palmatum
  • Eastern Redbud, Cercis canadensis
  • Canadian Hemlock, Tsuga canadensis

Vines and Shrubs

  • Euonymus species
  • Rose of Sharon, Hibiscus syriacus
  • Honeysuckle, Lonicera species
  • Virginia Creeper, Parthenocissus quinquefolia
  • Arborvitaes, Thuja species

Black walnut can be a challenging plant to have in your landscape, but if you understand the unique characteristics of this tree you can easily pair it with other plants that don’t mind its toxic effects.