Monthly Archives: January 2026

Kokedama: Easy How-To Instructions

Are you a gardener with a minimalist vibe? Well then, kokedama will give you all the right feels!

What is Kokedama?
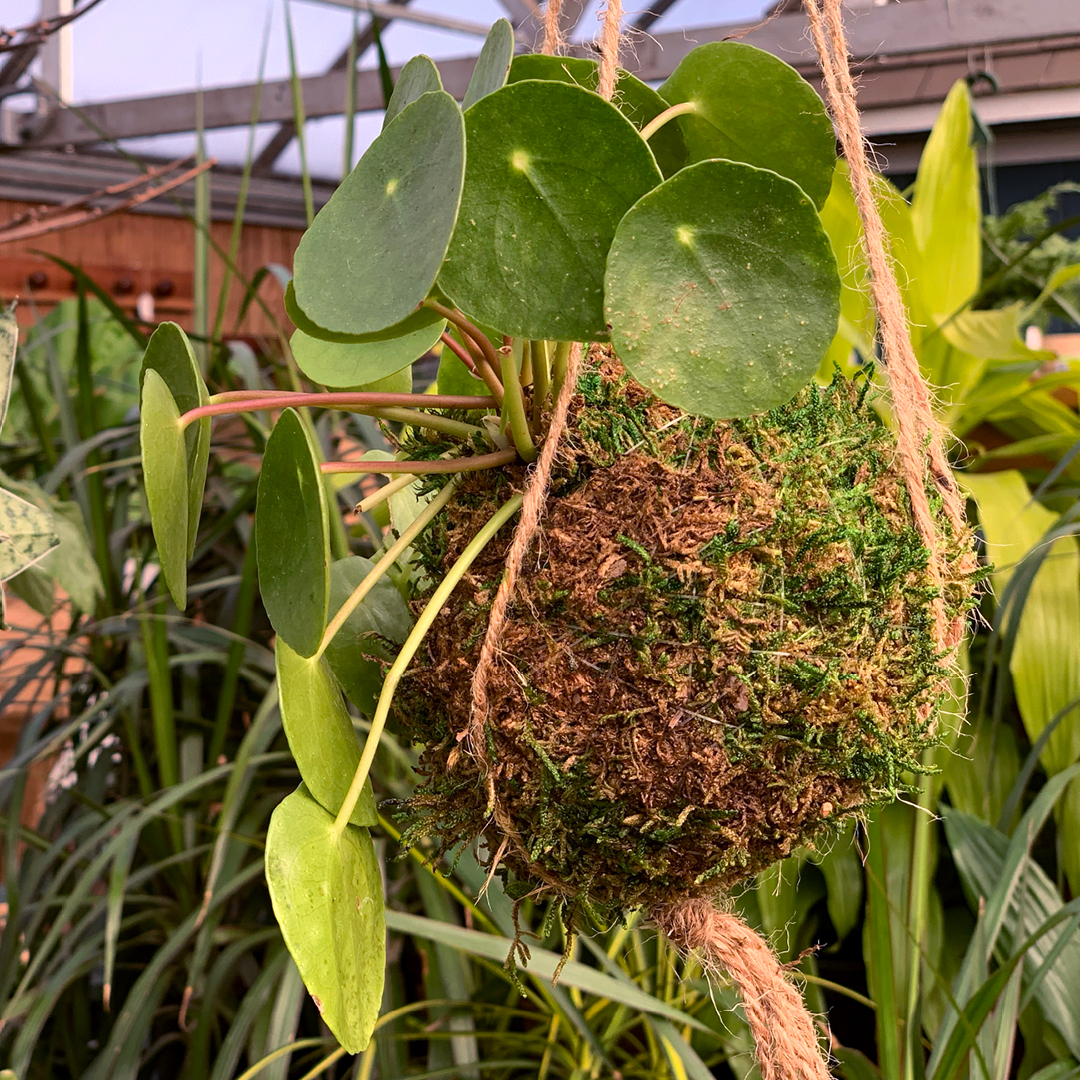
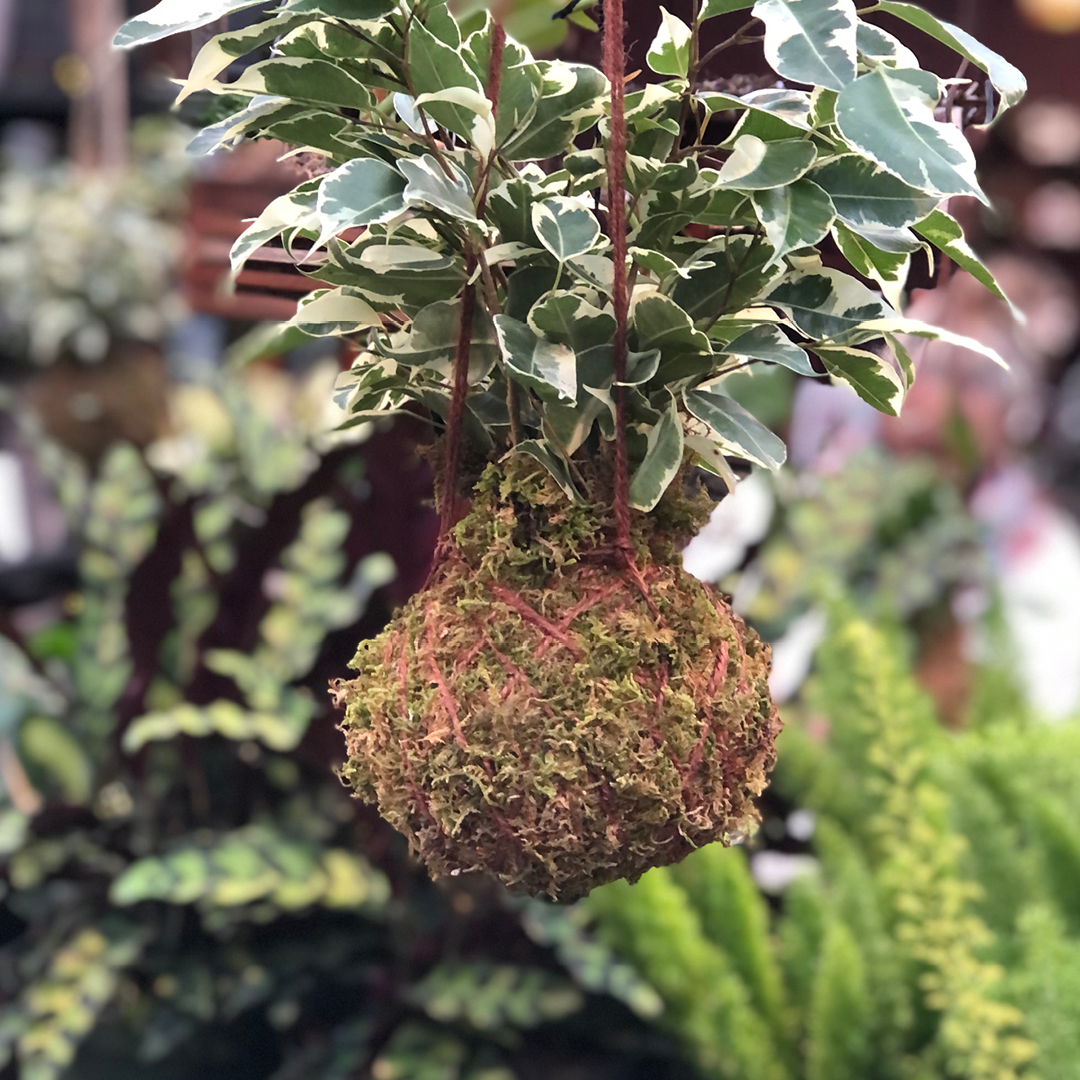
Kokedama, loosely translated as “ball of moss,” has become a popular trend in recent years, and for good reason. This Japanese art form eliminates planting pot use by wrapping moss around the root ball to create a beautifully minimalist plant display. If you’re interested in adding some greenery to your home and are looking for a space-saving option, then kokedama is for you.

One reason for kokedama’s recent surge in popularity is its practicality. Unlike traditional potted plants, kokedama is versatile and can be either hung in the home or placed in a saucer or bowl atop a table, shelf, mantle, windowsill, or other surface. Hanging is perfect for those with limited space. Additionally, kokedama is an enjoyable, easy, and unique way to create a stunning display that can last for years with minimal maintenance. It is also an excellent winter gardening project that is fun for the whole family.

Materials
Before you start your kokedama, gather your materials and choose them carefully.

  • Plants
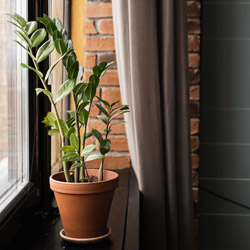
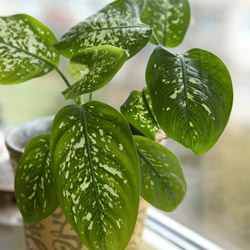
    Most small houseplants will do. African violet, anthurium, begonia, cyclamen, dracaena, ferns, peperomia, philodendron, pilea, and pothos are excellent beginner plants. Choose a plant whose light, temperature, and humidity needs match your display location.
  • Moss
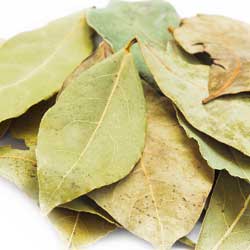
    Select sheet moss, either fresh or dried.
  • Soil
    Any high-quality potting soil will work. Soil amended with compost and vermiculite is ideal.
  • String
    Avoid jute or cotton, which decompose quickly. Waxed string or fishing line works best.
  • Incidentals
    Scissors are all that’s needed to cut moss and string.

How To Construct

  1. Premoisten soil so it holds together when shaped.
  2. Remove the plant from its pot and gently mold soil around the roots.
  3. Lay moss flat and place the soil ball in the center.
  4. Wrap moss around the soil ball, trimming excess.
  5. Secure moss with a loop of string.
  6. Wrap string tightly around the ball and tie off.
  7. Add three long strings evenly spaced for hanging.
  8. Balance the kokedama so it hangs evenly.
  9. Knot strings together to create a hanger.
  10. Hang and enjoy.

After Care
Understanding your chosen plant is key to long-term success.

  • Water
    Check moisture every few days. Soak fully, then squeeze excess water before rehanging.
  • Light
    Provide appropriate light for the selected plant.
  • Humidity
    Mist frequently, especially during dry winter months.
  • Feed
    Fertilize during the growing season using quarter-strength liquid fertilizer.
  • Groom
    Trim browning foliage and manage vining growth.

Kokedama is a simple, stylish way to bring greenery into your space. With minimal supplies and care, you can create a beautiful, pot-free plant display.

Note: Succulents may be used for kokedama but require more light and less water and humidity.

Kokedama moss ball plant
Kokedama construction process
Finished hanging kokedama

Winter Houseplant Care

With programmable thermostats, double-paned windows, and other tricks, we are able to keep our homes at the same climatic comfort level year-round. Indoor houseplants, however, can be sensitive to subtle seasonal changes. Even in a balanced home environment, proper winter houseplant care is essential to help plants thrive through this challenging season.

Winter Changes in Home Climates

While the winter changes in our homes are more subtle than the harsh freezes and deep snowfall outdoors, our home environments actually change more than we may realize. Depending on the conditions we like to maintain and the climate outdoors, winter changes may include…

  • Fewer hours of daylight, and the daylight that does exist is less intense than during the summer.
  • Lower temperatures often accompanied by chilly drafts from windows and doors.
  • Lower humidity levels, particularly if central heat has been running, which can dry out air.

These conditions are less than ideal for many houseplants, particularly tropical species that are adapted to longer hours of sunlight, higher temperatures, and richer humidity. Fortunately, with some extra care, winter houseplants can adapt and thrive even during the harshest winter months.

Adjusting Winter Houseplant Care

There are several steps you can take to adjust your houseplant care during the winter. Easy and effective steps include…

  • Reducing Watering – Many houseplants go dormant in the winter and require much less water. Overwatering can lead to root rot. Use room-temperature water when watering.
  • Reducing Feeding – Plants need less nutrition during winter dormancy. Reducing fertilizer until spring prevents weak, leggy growth.
  • Improving Humidity – Use a humidifier, cluster plants, place them in bathrooms, mist frequently, or use pebble trays without letting pots sit in water.
  • Relocating Plants – Move plants to south or west-facing windows for better light. Keep foliage from touching cold glass.
  • Supplementing Light – Add grow lights when natural light is insufficient. Open draperies and clean windows to increase light.
  • Dusting Plants – Clean foliage with a damp cloth or gentle shower so plants can absorb light more efficiently.
  • Rotating Plants – Rotate plants every few days to prevent stretching and uneven growth.
  • Watching for Pests – Monitor for spider mites, mealybugs, fungus gnats, and other pests. Treat promptly with insecticidal soap or neem oil.

Houseplants offer valuable benefits in winter, helping alleviate Seasonal Affective Disorder and improving mood and well-being. With proper winter care, your plants can remain healthy, vibrant, and inspiring throughout the colder months.

Winter houseplant care overview
Indoor plant light adjustment in winter
Increasing humidity for houseplants
Cleaning and rotating houseplants in winter

Bay: An Herb Worth Enjoying

A staple in most kitchens, bay (Laurus nobilis) is a familiar herb popular for flavoring soups, stews, stuffing, and marinades. But how much do you know about this savory seasoning?

History of Bay

Originally from Asia Minor, including Turkey and Armenia, bay is a broadleaf evergreen also known as sweet bay, bay tree, or bay laurel. Because of its popularity and multiple uses, it spread throughout the Mediterranean and beyond. In ancient Greece and Rome, bay wreaths were worn for protection and as symbols of victory and honor.

Unique Uses for Bay

Bay leaves have long been used in flour and grain storage to deter pantry moths. Medicinally, bay has been used to help treat high blood sugar, migraines, and bacterial and fungal infections. Bay oil has been used in liniments and salves for bruises and sprains. These evergreen plants are also attractive landscape additions and can be grown as topiaries, hedges, or houseplants.

Bay leaves may be used fresh, though dried leaves are more common. Fresh leaves are milder, while drying intensifies the flavor. Whole leaves are typically removed before serving, as the dried edges can be sharp if ingested.

Growing Bay

Bay is easy to grow in pots on patios or indoors. Provide full sun for at least half the day or place indoors near a sunny window. Leaves may be harvested as needed, and plants should be pruned to size since they naturally grow into trees. Leaves can be dried in a low oven or hung upside down in a cool, dark, dry area until fully dry. Properly stored dried leaves can retain flavor for a year or longer.

Try a New Bay Recipe

Bay is commonly used in savory dishes, but it can also enhance sweet recipes. Try this unique dessert to experience bay’s versatility.

Bay & Warm Bananas with Vanilla Ice Cream (from the Food Network)

  • 4 tablespoons butter
  • 2 bay leaves
  • 2 tablespoons freshly squeezed lemon juice
  • 1 cup fresh or frozen orange juice
  • 1 cup packed light brown sugar
  • 2 tablespoons bourbon
  • Pinch salt
  • 6 not quite ripe bananas, peeled and cut into bite-sized pieces
  • 1/4 teaspoon freshly ground black pepper

In a small skillet over medium heat, melt the butter and cook until browned, about 3–4 minutes. Add bay leaves, then stir in lemon and orange juices, brown sugar, bourbon, and salt. Simmer until reduced by half and syrupy, about 5 minutes. Remove from heat, add bananas and black pepper, and stir to coat. Serve hot over ice cream.

Bay herb plant

Seed Viability

The perfect way to spend a cold winter’s day is commencing this year’s veggie, herb, and flower gardens. The gardening season begins in earnest in February with seed-starting, and seed-starting begins with an inventory of necessary supplies. To prepare for this endeavor, you will need:

  • Seed-starting mix
  • Containers (flats, peat pots, cell packs, etc.)
  • Labels and markers
  • Heat mats
  • Grow lights
  • Spray mister and watering can
  • And, of course, seeds

If this is not your first seed-starting rodeo, you will already have a number of these supplies on hand and will just need to supplement your inventory where necessary.

But the seeds, what about the seeds? Can last year’s excess be used for this year’s plants? Let’s find out!

Leftover Seed
Don’t throw away leftover seeds. Most vegetable, herb, and flower seeds are viable for much longer than we may anticipate, especially when stored properly.

Instead, test the seeds to assess their viability. Here’s how:

  1. Dampen a paper towel.
  2. Place ten seeds, all from the same pack, on the paper towel.
  3. Gently fold the damp paper towel and slip it into a sealable plastic bag.
  4. Label the bag with the date and the seed name.
  5. Place the bag in a warm area in the home out of direct sun.
  6. Check the seed pack or look up the germination timeframe.
  7. Check seeds twice weekly until about a week after the expected germination time.
  8. Calculate germination percentage based on how many seeds sprout.
  9. We recommend purchasing new seeds if germination is under 50%.
  10. Pre-sprouted seeds may be planted in pots or cell packs.

Even under perfect storage conditions, seed viability declines each year. Test older seeds annually. Seeds that only germinate when fresh are not worth testing.

Seed Storage
Proper storage plays an important role in seed viability. We recommend:

  • Store seeds in a cool, dark environment such as a refrigerator or basement.
  • Keep storage temperature consistent.
  • Maintain relative humidity under 40% using sealed containers.
  • Ensure containers are varmint-proof.

Clearly label seed containers with plant name, variety, purchase date, and any helpful notes.

Seed Viability Charts
Clear Creek Seeds (https://www.clearcreekseeds.com/seed-viability-chart/) offers an excellent seed viability chart, included here for reference.

Seed viability chart example
Seed germination comparison
Seed storage and testing illustration

Anti-Desiccants: Why, What, and When

You’ve removed late-autumn weeds, layered on the mulch, pruned appropriately, possibly even covered or wrapped your plants – so why do some still die in the winter, despite all your well-meaning efforts?

Many plants die during winter because they dry out, or desiccate. As temperatures drop, the ground freezes and plant roots cannot take water from the soil, no matter how much snow may fall. This causes the plant to use stored water from the leaves and stems as part of the transpiration process, during which water exits the plant through the leaves. If the sun is shining or the wind is blowing, transpiration increases and more water exits the leaves. If no water is available and transpiration continues, the plant will soon die. Because evergreen plants do not drop their leaves, they are especially susceptible to this death.

Preventing Desiccation

How can you help your plants stay well-hydrated through the frozen drought of winter? The first step is to remember healthy plants in the summer survive the hardships of winter far better than sickly or stressed plants. Through the spring, summer and fall, you should always be on the lookout for signs of pests, diseases and damage, and take all necessary steps to keep your plants thriving.

Second, be sure to water well even when temperatures begin dropping below freezing. Later, if the ground thaws, water before the ground refreezes. Water slowly to provide a deep drink without waterlogging the roots, however, so they are not damaged by ice.

The third step is to use an anti-desiccant, also called an anti-transpirant, to reduce the moisture loss from the leaves and needles. Because broadleaf evergreens such as boxwood, aucuba, holly, rhododendron, many laurels, Japanese skimmia and leucothoe do not drop their leaves, they are especially vulnerable to winter death. Using a product such as Wilt-Pruf to reduce transpiration by protecting the pores will save many broadleaf evergreens.

When using any horticultural product, be sure to check the label and follow all instructions properly. Some conifers such as cedar, cypress, juniper and pine may benefit from these products. However, be sure to read the instructions to prevent burning specific conifers. Also, do not use on “waxy” blue conifers, such as blue spruce, which already have an oily protective film on the needles.

Here are a few reminders to get the best protection from an anti-desiccant:

  • Plan to apply when day temperatures begin dropping below 50° Fahrenheit. Apply when temperatures are above freezing on a dry day with no rain or snow anticipated within 24 hours.
  • Do not spray conifers until thoroughly dormant, generally in late winter.
  • Generously apply to dry leaves and needles. Don’t forget the undersides. Spray from several angles to ensure complete coverage.
  • Because the anti-desiccant will break down in light and warmth, reapply in late winter on a dry day when temperatures are above freezing for at least 24 hours.

Beyond Winter Drought

Other than protecting your landscape evergreens from winter drought, there are other uses for anti-desiccants. Many gardeners use it to protect newly transplanted shrubs from drying winds and sunshine as they settle in. It also provides protection to tender bulbs going into storage. A quick spray in early winter protects rose canes and hydrangea stems. Spraying onto live or cut Christmas trees and carved pumpkins slows the drying process, making them last longer for greater holiday enjoyment.

To answer your questions, or to choose the best product for your landscape plants, come in to discuss anti-desiccants with one of our friendly and knowledgeable staff members. Together, we can reduce the number of plants you lose to the dryness of winter and keep your garden beautiful and healthy.

Anti-desiccant application on evergreens
Winter plant protection using anti-desiccant
Evergreen winter care treatment

A Buffet of Berries for Winter Birds

Plants with berries add winter interest to the garden and also attract many different types of birds. But which berries are best for your yard, and how can you ensure a bountiful buffet for your feathered friends to enjoy?

Caring for Berries

No matter which berries you choose to add to your landscape, opt for varieties native to your region. Native berries are better adapted to local climate conditions, and regional birds recognize them as safe, familiar food sources.

Plant berry bushes as early as possible so they have time to establish and produce abundant fruit. Water well through summer and fall, and avoid pruning in autumn so berries and shelter remain available for winter wildlife.

Best Winter Berries

Many berry-producing plants attract winter birds, but two stand out for both beauty and wildlife value.

  • Hollies
    Hollies provide long-lasting forage, excellent shelter, and berries in red, orange, and yellow shades. Birds that enjoy holly berries include robins, blue jays, eastern bluebirds, red-bellied woodpeckers, grouse, and quail. The sharp foliage also deters predators, and cut branches make striking holiday décor.
  • Pyracantha
    Also known as firethorn, pyracantha attracts thrushes, bluebirds, woodpeckers, cardinals, purple finches, grouse, and quail. Dense clusters of bright berries and thorny branches provide food, shelter, and protection throughout winter.

Winter birds will love the berries they find in your yard, and you’ll enjoy the seasonal color and visual interest these plants provide.

Winter berry plants for birds
Birds feeding on winter berries
Berry-producing shrubs in winter